Stop Masking, Start Eliminating: A Step-by-Step System to Identify, Neutralize, and Prevent Every Type of Household Odor—Grounded in Chemistry and Practical Home Care
That persistent fish smell after dinner. The faint mustiness near the shower curtain. The unmistakable evidence your dog encountered something questionable on his walk. Household odors do more than annoy—they signal underlying processes in your living environment. Temporary fixes like sprays and candles merely layer fragrance over the source, creating sensory confusion while the root issue remains. True odor management requires understanding why a smell exists, targeting its molecular origin with appropriate methods, and implementing prevention strategies tailored to your home’s unique conditions. This guide offers a unified, actionable framework—developed through analysis of common odor challenges and established principles of chemistry, microbiology, and building science—to restore lasting freshness to every space, without gimmicks or guesswork.
Introduction
Odors are chemical signals: volatile organic compounds (VOCs), microbial byproducts, or decomposing matter released into your indoor air. When you detect sourness from a kitchen sponge or dampness near a windowsill, your senses are alerting you to active biological or chemical processes occurring now in your environment. Ignoring these signals may allow minor issues to escalate: persistent bathroom mustiness can indicate moisture intrusion affecting structural materials; lingering pet odors often reflect embedded organic residues that may trigger sensitivities; unaddressed humidity-related smells frequently precede visible microbial growth. Drawing on established principles of organic chemistry, environmental science, and moisture management, this guide synthesizes evidence-based protocols into a practical system any homeowner can apply. We move beyond fragmented tips to deliver a cohesive methodology where understanding the source informs the solution—transforming odor management from reactive chore into proactive home stewardship. Your journey begins not with a spray bottle, but with mindful observation.
The ROOT Framework: Recognize, Obliterate, Overcome, Transform
Most odor resources fail by jumping straight to remedies without diagnosing why the odor exists. This reactive approach often wastes effort and delays resolution. The ROOT Framework reverses this pattern. Developed through analysis of recurring challenges in household odor management, it provides a sequential cognitive roadmap applicable to any smell, in any space. By progressing deliberately through these four phases, you systematically address odors at their origin while building resilience against recurrence. This is not merely a cleaning checklist—it’s a mental model for reading your home’s environmental cues with clarity and purpose.
Step 1: Recognize the Source (Diagnose Before You Act)
Before selecting any product, become an odor detective. Misidentification is the most common reason elimination efforts fail. Is that “garbage smell” from rotting food in the disposal, bacterial buildup in the drainpipe, or a dry P-trap allowing sewer gases to enter? Each requires a fundamentally different approach. Cleaning the visible sink surface while ignoring a compromised plumbing seal guarantees recurrence.
How to Conduct an Odor Audit:
– Timing Matters: Note when the odor intensifies. Does it emerge after showering (suggesting moisture-related microbial activity)? Appear only when the HVAC operates (indicating duct or coil contamination)? Surface at dusk (temperature/humidity shifts activating dormant residues)? Smells worsening after rain may signal foundation seepage or grading issues.
– Location Mapping: Move slowly through the space. Crouch. Smell near baseboards, under sinks, behind appliances, inside cabinets. Gently waft air toward your nose with your hand. Is the scent concentrated in one spot (localized source) or diffuse (airborne circulation)? Place a clean white paper towel on suspect surfaces (grout, carpet); check after 10 minutes for discoloration or dampness.
– Source Categorization: Classify using this practical key:
– Organic Decay: Rotting food, garbage, deceased insects (sour, putrid notes). Source: Bacterial decomposition producing sulfur compounds or amines.
– Microbial Growth: Musty, earthy, “wet basement” smells (mold, mildew, bacteria in damp zones). Source: Microbial volatile organic compounds (mVOCs) from organisms thriving on moisture.
– Pet-Related: Urine (ammonia-like), feces, anal gland residue, “wet dog” (bacterial breakdown of skin oils/fur). Source: Urea crystallization, bacterial metabolism of proteins/fats.
– Cooking Residues: Grease, fish, spices (oily, pungent, lingering). Source: Lipid oxidation, protein residues adhering to surfaces or vents.
– Chemical/Off-Gassing: New carpet, paint, plastics (sharp, synthetic notes). Source: VOCs released during material curing or degradation.
– Sewer/Gas: Rotten eggs (hydrogen sulfide), gasoline-like notes. Source: Dry plumbing traps, compromised sewer lines, gas leaks (immediate safety hazard).
Why This Step is Essential:
Consider a persistent bathroom odor repeatedly treated by scrubbing tiles. If the true cause is a compromised wax ring seal under the toilet allowing sewer gases to seep upward, surface cleaning will never resolve it. Recognition prevents misdirected effort. In documented restoration scenarios, odors traced to disconnected dryer vents exhausting moist air into crawlspaces were resolved through targeted repair—not air fresheners. Your observational skills are your most precise diagnostic tool; train them to ask “why” before “how.”
Common Recognition Pitfalls to Avoid:
– Assuming the Obvious: A “trash can smell” may originate from bacterial growth under the can where liquid pooled, not inside it.
– Ignoring Seasonal Patterns: Smells appearing only in humid months often relate to moisture activating dormant residues; winter-only odors may stem from reduced ventilation trapping cooking fumes.
– Overlooking Hidden Zones: Inspect appliance drip pans (refrigerator, AC), under sink cabinets (leaks), behind washing machines (hose mold), and HVAC return vents.
The Fundamental Principle: Odors are symptoms; the source is the condition. Address the condition, and the symptom resolves.
Step 2: Obliterate at the Source (Precision Neutralization)
With the source identified and categorized, deploy targeted countermeasures aligned with the contaminant’s chemistry. Not all remedies work universally—and some can worsen the issue. Vinegar neutralizes alkaline residues (like urine) but is less effective against acidic ones (like vomit). Baking soda adsorbs some airborne molecules but does not eliminate embedded biological matter. True resolution requires matching the method to the molecular profile of the contaminant.
Core Neutralization Mechanisms
1. Oxidation: Breaks down odor molecules chemically (e.g., hydrogen peroxide, oxygen bleach/sodium percarbonate). Ideal for organic stains (blood, wine, pet accidents), smoke residue. Caution: Test on hidden area first; may affect dyes.
2. Adsorption: Physically traps molecules on porous surfaces (e.g., activated charcoal, baking soda in enclosed spaces). Best for airborne VOCs, lingering cooking smells in pantries. Note: “Adsorption” (surface binding) ≠ “Absorption” (soaking in).
3. Enzymatic Digestion: Uses microbial enzymes to consume the organic matter causing the odor (e.g., pet urine, feces, food waste). This is the most effective approach for biological residues. Chemical cleaners often mask until reactivation occurs.
Room-by-Room Obliteration Protocols
🍳 Kitchen: Beyond Surface Cleaning
Kitchen odors commonly stem from lipid oxidation (rancid oils), protein residues, and microbial growth in hidden moisture zones.
-
Garbage Disposal & Drain:
Why it works: Citrus acids help cut grease films where bacteria thrive. Baking soda/vinegar creates mild effervescence to lift debris—but alone may not address biofilm.
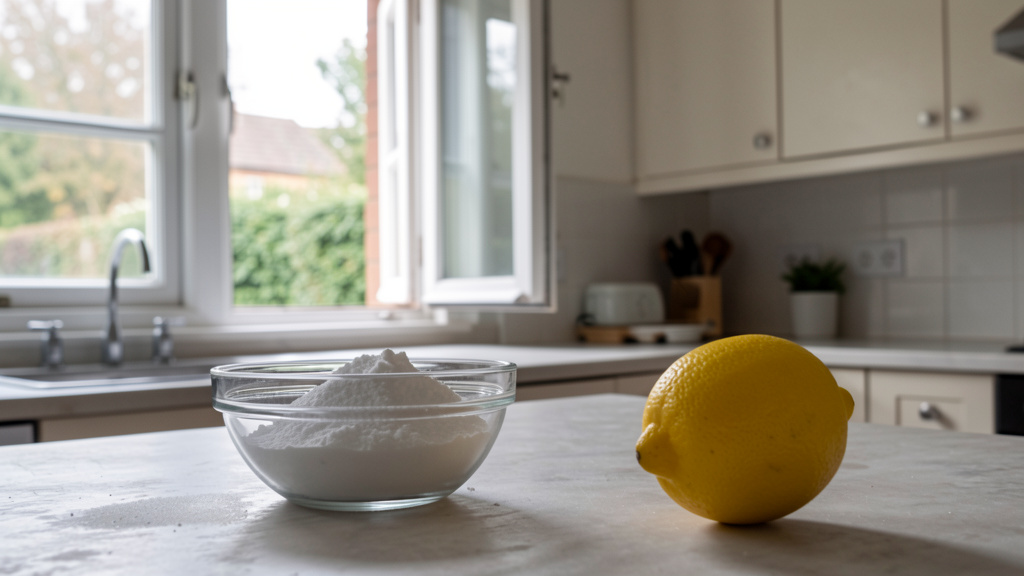
Ideal Method: Pour ½ cup baking soda down disposal. Follow with 1 cup white vinegar. Let foam 5 minutes. Flush with very hot (not boiling) water 30 seconds. Grind 2 lemon halves + 1 cup ice cubes. For persistent issues, use a dedicated drain brush to clean the rubber splash guard and chamber walls.
Budget Method: Freeze vinegar in ice cube trays. Drop 3–4 cubes down disposal weekly while running cold water.
Critical Note: Avoid bleach in disposals. It reacts with organic debris to form irritating gases and damages rubber components. Grease—not just food scraps—is often the primary odor source. -
Refrigerator/Freezer:
Why odors persist: Spills seep into drip trays, seals, and insulation. Plastic components can absorb smells over time.
Ideal Method: Unplug unit. Remove shelves/drawers. Wash interior with 2 tbsp baking soda + 1 quart warm water. For stubborn residues, use 3% hydrogen peroxide on a cloth (test hidden spot first). Clean condenser coils (vacuum dust) and drip pan (consult manual for location). Place an open box of baking soda and a small bowl of activated charcoal on separate shelves. Replace monthly.
Pro Tip: Tape a coffee filter filled with activated charcoal inside the door—renew monthly. It helps adsorb ethylene gas from ripening produce that accelerates spoilage odors.
Insight: Persistent odors may originate from less obvious sources, such as compromised seals or internal components requiring professional assessment. -
Range Hood & Grease Traps:
Why it’s overlooked: Grease accumulates in filters, ducts, and motor housing—becoming rancid and posing fire risks.
Ideal Method: Remove metal filters. Soak in hot water + ¼ cup dishwasher detergent (not dish soap—it creates excess suds) + ½ cup baking soda for 20 minutes. Scrub gently. For ducted systems: Schedule professional duct cleaning annually. For recirculating hoods, replace carbon filters per manufacturer guidelines (typically every 3–6 months). Wipe hood interior with a degreasing solution (vinegar + dish soap).
Budget Method: Line filters with aluminum foil (shiny side out) for easy weekly replacement. Never use foil near heating elements—fire hazard.
Safety Note: Heavily caked filters should be replaced immediately. Grease buildup is a documented fire hazard in residential kitchens.
🛁 Bathroom: Addressing Moisture-Related Odors
Bathroom smells typically signal moisture management opportunities. Mildew (surface fungi) and deeper mold produce mVOCs with characteristic “damp” notes.
-
Shower/Tub Grout & Caulk:
Why vinegar has limits: Vinegar (acetic acid) affects surface mildew but cannot penetrate porous grout to reach roots. Chlorine bleach whitens but doesn’t eliminate deep growth and releases fumes in enclosed spaces.
Ideal Method: For mildew on non-porous surfaces (tile, acrylic): Spray 3% hydrogen peroxide. Wait 10 minutes. Scrub gently. Rinse. For grout: Make a paste of oxygen bleach (sodium percarbonate—not chlorine bleach) + water. Apply thickly to grout lines. Cover with plastic wrap to retain moisture. Wait 1–2 hours. Scrub. Rinse thoroughly. Oxygen bleach releases oxygen ions that lift residues and inhibit microbes without harsh fumes.
Budget Method: Paste of baking soda + hydrogen peroxide. Effective for light surface mildew.
Critical Note: Avoid chlorine bleach on colored grout (may cause discoloration) or natural stone (marble, travertine)—use pH-neutral cleaners only.
Prevention: After showering, squeegee walls and floor. Run exhaust fan 20–30 minutes after showering (or open window). Wipe silicone caulk weekly with diluted vinegar solution to discourage mildew seeding. -
Toilet Tank & Bowl:
Why the tank matters: Mineral deposits and biofilm in the tank can contribute to bowl odors.
Ideal Method: Turn off water supply. Flush to empty tank. Pour 1 cup white vinegar into tank. Let sit 1 hour. Scrub interior gently. Restore water. For bowl: Drop 2 denture cleaning tablets overnight. They effervesce to lift residues below the waterline without harsh scrubbing.
Budget Method: ½ cup baking soda + 1 cup vinegar in bowl. Let fizz 15 minutes before scrubbing.
Hidden Source: If floor around toilet base is damp or emits sewer-like odors, the wax ring seal may be compromised—consult a plumber for assessment. -
Sink Drain & P-Trap:
Why smells return: The P-trap (U-shaped pipe) holds water to block sewer gases. If unused (guest bathroom), water evaporates, breaking the seal.
Ideal Method: Pour 1 quart of water down every drain monthly (including basement floor drains) to maintain P-trap seal. For active odor: Pour ½ cup baking soda followed by 1 cup vinegar. Cover drain 10 minutes. Flush with very hot tap water (avoid boiling water on PVC pipes). Follow with an enzymatic drain maintainer to digest organic buildup.
Pro Tip: Use mesh drain covers in sinks to catch hair/debris—clean weekly to prevent clogs where bacteria thrive.
🐾 Pet Zones: Addressing Biological Residues
Pet odors involve complex chemistry: urine contains urea (converts to ammonia), uric acid crystals (reactivate when damp), and bacteria. Feces and anal glands add fatty acids and sulfur compounds. “Wet dog” smell arises from skin/fur bacteria releasing mVOCs when damp.
-
Urine on Hard Surfaces (Tile, Vinyl, Laminate):
Why vinegar isn’t sufficient: Vinegar neutralizes ammonia notes but doesn’t dissolve uric acid crystals embedded in micro-cracks.
Ideal Method: Blot immediately with paper towels. Spray area with 50/50 white vinegar/water. Wait 5 minutes. Blot dry. Apply undiluted enzymatic cleaner. Saturate until liquid pools slightly. Cover with plastic wrap to retain moisture 10–15 minutes (enzymes require moisture). Blot excess. Air dry—avoid heat (can set crystals).
Critical Note: Avoid steam cleaners on urine residues. Heat can bond crystals permanently to surfaces.
Verification: A UV (blacklight) flashlight in a dark room can reveal residues (urine often glows yellow-green). Treat all visible areas, even if odor isn’t detectable. -
Urine on Carpet/Upholstery:
Why surface treatment fails: Baking soda sits on fibers while crystals penetrate padding or subfloor.
Ideal Method: Blot aggressively with white paper towels (press, don’t rub). Mix 1 tbsp dish soap + 1 cup warm water. Dab to lift surface residue. Blot dry. Apply enzymatic cleaner generously to saturate through carpet into padding. Place weighted paper towels on spot. Replace every 2 hours until dry. For older residues: Pre-treat with enzymatic solution before using a carpet extractor with cold water only.
Budget Method: 3% hydrogen peroxide + dish soap + baking soda paste. Apply, wait 15 mins, blot. Always test on hidden area first—peroxide may affect dyes.
Insight: Deep-seated odors may require treating underlying layers. If residues have penetrated subfloor, professional assessment may be warranted. -
Pet Bedding & “Wet Dog” Smell:
Ideal Method: Wash bedding weekly in cold water with an enzymatic laundry additive. Add ½ cup white vinegar to rinse cycle to neutralize residues and soften fabric. Air dry in sunlight when possible—UV light has natural deodorizing properties. For “wet dog” smell on furniture: Sprinkle baking soda liberally. Wait 15+ minutes. Vacuum thoroughly with HEPA filter vacuum. Lightly mist with 1 part vodka : 3 parts water (vodka evaporates quickly, helping neutralize surface bacteria without over-wetting).
Prevention: Brush pets regularly to reduce dander/oil buildup. Wipe paws with pet-safe wipes after walks. Use washable throws on furniture.
💧 Humidity & Musty Spaces: Addressing the Moisture Source
Musty odors indicate microbial activity. Cleaning surfaces alone is ineffective without managing moisture. This step is critical for lasting results.
- Basements, Closets, Attics:
Diagnosis First: Use a hygrometer (inexpensive at hardware stores). If relative humidity (RH) consistently exceeds 60%, moisture is likely the driver. Check for: - Condensation on pipes/windows (consider pipe insulation, improved ventilation)
- Damp spots on walls/floors (may indicate leaks, drainage issues)
- Odor intensifying after rain (possible foundation seepage)
Ideal Method: - Source Control: Address leaks, improve exterior grading, consider sump pump if needed. Seal visible foundation cracks with appropriate sealant.
- Dehumidify: Run a dehumidifier sized for the space (e.g., 50-pint for ~1,500 sq ft basement). Maintain RH below 50%. Empty tank regularly or use continuous drain.
- Surface Treatment: For non-porous surfaces (concrete, metal): Scrub with oxygen bleach solution (1 cup per gallon warm water). For wood: Use a mold-inhibiting product like Concrobium Mold Control (follow label instructions). Never mix cleaning agents.
-
Air Exchange: Open windows on dry days. Consider exhaust fan installation for enclosed spaces.
Budget Method: Place bowls of calcium chloride (DampRid) in corners. Replace when dissolved. Use silica gel packs in small closets (rechargeable in oven).
Critical Guidance: If visible growth covers more than 10 square feet, is behind walls, or you suspect structural moisture issues, consult a qualified remediation professional. Disturbing large colonies can release spores. -
Clothes Dryer & Laundry:
Why clothes smell “musty” after washing: Front-loading machines can trap moisture in door gaskets. High-efficiency detergents may leave residues that harbor bacteria.
Ideal Method: - Wipe door gasket and detergent drawer after every load. Leave door ajar between uses.
- Run empty maintenance cycle monthly with 1 cup vinegar or washer cleaner.
- Clean lint trap before every load. Vacuum lint chute annually.
- For smelly clothes: Rewash with 1 cup vinegar in rinse cycle. Add ½ cup baking soda to drum. Air dry in sun if possible.
Prevention: Avoid leaving wet clothes in washer >30 minutes. Use recommended detergent amount (often less for HE machines).
Step 3: Overcome Lingering Particles (Air & Surface Renewal)
Even after source treatment, odor molecules may linger in air, fabrics, and porous materials. This phase refreshes the environment to support lasting results and provide immediate sensory improvement.
Air Renewal Strategies:
– Ventilation is Foundational: Open windows on opposite sides of the house to create cross-breeze. Run exhaust fans during/after cooking or showering. In tightly sealed homes, consider an energy-recovery ventilator (ERV) for balanced fresh air exchange.
– HEPA Filtration: Captures 99.97% of particles 0.3 microns (dander, mold spores, dust). Run air purifier continuously in affected rooms. Select unit sized for room square footage (check CADR rating).
– Activated Charcoal Filters: Essential for gaseous odors (cooking smoke, VOCs). Many HEPA purifiers include charcoal layers—verify replacement filters contain adequate charcoal. Place standalone charcoal bags (e.g., Moso Natural) in closets, shoes, or cars.
– Important Caution: Avoid ozone generators marketed as “odor eliminators.” Ozone is a lung irritant, can react with household chemicals to form harmful byproducts, and merely masks odors at unsafe concentrations. The EPA and health agencies advise against residential ozone use.
Surface & Fabric Refresh:
– Upholstery/Curtains: Vacuum thoroughly with upholstery attachment. Sprinkle baking soda. Wait 15+ minutes. Vacuum again. For delicate fabrics, use a fabric refresher with odor-neutralizing technology (e.g., cyclodextrin-based formulas).
– Mattresses: Vacuum surface. Spot-treat residues with hydrogen peroxide/baking soda paste (test first). Sprinkle entire surface with baking soda. Wait 1 hour. Vacuum thoroughly. Sun-dry if feasible (UV light helps reduce dust mites).
– Shoes: Stuff with newspaper + activated charcoal bags overnight. Sprinkle baking soda inside; shake out next day. Cedar shoe trees absorb moisture and provide subtle deodorizing.
The “Reset” Protocol for Whole-House Refresh (Post-Cooking, After Guests):
1. Open windows throughout the house for 15 minutes to flush air.
2. Place shallow bowls of white vinegar in central locations (adsorbs airborne molecules).
3. Simmer water with citrus peels, cinnamon sticks, and cloves on the stove—not to mask, but to create a pleasant sensory transition while air clears. Turn off before water boils dry.
4. Run HVAC fan continuously (not “auto”) for 1 hour with a clean filter to circulate air through the system.
Step 4: Transform Your Habits (Prevention as Practice)
Lasting freshness emerges from consistent, small-scale practices that disrupt odor formation cycles. Integrate these micro-habits seamlessly into your routine:
- Kitchen Daily: Wipe stovetop after cooking. Take out trash before full. Rinse dishes promptly. Maintain disposal with weekly citrus/ice treatment.
- Bathroom Daily: Squeegee shower walls. Wipe sink/faucets dry. Run exhaust fan during and 20+ minutes after showering. Keep toilet lid closed when flushing (reduces aerosolized particles).
- Pet Zones Daily: Scoop litter box twice daily (clumping litter helps contain odors). Wash food/water bowls daily. Use entryway mats for paw wiping.
- Humidity Control Daily: Monitor hygrometer readings. Empty dehumidifier tank. Check for condensation on windows/pipes. Use exhaust fans consistently.
- Weekly Rituals: Clean sink drains. Wash pet bedding. Vacuum upholstery. Inspect under sinks for leaks. Replace HVAC air filter per manufacturer guidance (standard filters every 1–3 months).
- Seasonal Deep Dives: Spring: Clean gutters, check foundation grading. Fall: Seal window/door gaps, inspect dryer vent. Winter: Verify humidifier settings (<45% RH). Summer: Inspect AC drip pan, clean condenser unit.
This transformation shifts odor management from crisis response to integrated home care—cultivating an environment where freshness is the natural outcome of mindful maintenance.
Advanced Scenarios: Navigating Complex Situations
Some circumstances require specialized awareness. Understanding these contexts helps set realistic expectations and identifies when professional support is advisable.
Smoke & Fire Damage Residues
Cigarette smoke permeates walls, insulation, and ductwork with tar and nicotine. Wildfire smoke contains complex particulates and VOCs.
Why Surface Cleaning Often Falls Short: Residues embed deeply; ozone “treatments” by unlicensed operators carry health risks and limited efficacy.
Professional Approach:
– Assessment: Certified restoration professionals use specialized tools to assess residue penetration.
– Cleaning: HEPA vacuuming of all surfaces. Wet cleaning with appropriate solvents.
– Sealing: Application of odor-sealing primer (e.g., Kilz Restoration) to walls/ceilings before repainting—this step helps block off-gassing.
– HVAC: Filter replacement, duct inspection/cleaning, installation of high-MERV filters post-remediation.
DIY Consideration: For minor cigarette odor in a rental: Wash walls with TSP substitute, seal with odor-blocking primer, repaint. For significant fire damage involving soot or structural impact—contact insurance and qualified professionals. Soot contains irritants; improper handling can spread contamination.
Flood & Water Intrusion
Standing water beyond 24–48 hours encourages microbial growth. Musty odors post-flood indicate active biological processes.
Initial Actions (First 24–48 Hours if Safe):
1. Stop water source if possible without risk.
2. Extract standing water with wet/dry vacuum.
3. Remove saturated porous materials: carpet, padding, drywall up to 12″ above water line.
4. Deploy air movers and dehumidifiers. Monitor until materials reach safe moisture levels.
Critical: Avoid operating HVAC—it may spread spores. Discard insulation contaminated by Category 3 water (sewage, floodwater).
Professional Guidance: For floods involving sewage, rising groundwater, or extensive wet materials—consult IICRC-certified water damage restoration professionals. They utilize moisture mapping and antimicrobial treatments to address hidden concerns.
Persistent “Mystery” Odors
When the source remains elusive after thorough ROOT Framework application:
– Maintain a Log: Note time, weather, HVAC status, activities preceding the odor. Patterns may emerge (e.g., odor only when furnace runs = potential heat exchanger issue).
– Inspect Less Obvious Areas:
– Inside walls: Intensely putrid, localized smell may indicate deceased animal. Contact pest control.
– Electrical: Burning plastic smell near outlets/appliances = potential fire hazard. Turn off circuit; contact electrician immediately.
– HVAC System: Musty smell only when AC runs may indicate “dirty sock syndrome” (microbial growth on evaporator coil). Professional coil cleaning may be needed.
– Professional Assessment: An indoor air quality (IAQ) specialist can use moisture meters, borescopes, or VOC meters to identify hidden sources.
Navigating Challenges: Practical Troubleshooting
Even diligent efforts may encounter obstacles. This section offers clear-eyed guidance to help you progress confidently.
Verification Checklist Before Escalating
Before concluding a method failed, review these common oversights:
– Source Access: Was only the surface treated while residue remained in padding, subfloor, or behind caulk? Re-audit with UV light (for organic residues) or moisture meter.
– Product Application: Enzymatic cleaners require saturation and dwell time (10–15 mins while moist). Oxygen bleach solutions lose potency if pre-mixed. Vinegar needs direct contact—not airborne misting.
– Environmental Factors: Is humidity consistently above 60%? Address moisture first—cleaning alone won’t prevent recurrence. Is the pet returning to the same spot? Use deterrents on treated areas.
– Tool Hygiene: Using the same cloth/sponge across zones spreads residues. Designate color-coded cleaning tools per area (e.g., red=bathroom, yellow=kitchen). Wash tools after use.
Knowing When to Seek Professional Support
DIY has appropriate boundaries. Consider expert assistance when:
– Health Considerations: Unexplained respiratory irritation, headaches, or allergy symptoms coincide with odor exposure—especially for sensitive individuals.
– Structural Indicators: Suspected microbial growth behind drywall, under flooring, or in attics. Visible growth exceeding 10 sq ft. Water stains on ceilings/walls.
– Plumbing/Gas Concerns: Sewer smell persisting after P-trap refill. Rotten egg smell near water heater (may indicate anode rod issue). Gas leak smell (rotten eggs added to natural gas): Evacuate immediately. Call utility company from outside.
– HVAC Issues: Persistent musty odor only when system operates. Visible growth in ducts.
– Biohazard Situations: Trauma or crime scene residues require certified biohazard remediation teams with specialized protocols.
Selecting Qualified Professionals:
– For microbial concerns: Look for IICRC-certified Applied Microbial Remediation Technicians (AMRT). Verify credentials, insurance, and request a written scope of work.
– For HVAC: NATE-certified technicians. Request duct inspection documentation before approving cleaning.
– For general IAQ: Certified Indoor Environmental Consultants (CIEC) through ACAC.
Working Within Constraints: Smart Prioritization
Limited resources call for strategic focus:
1. Safety First: Address gas leaks, electrical burning smells, or sewage backups immediately.
2. High-Impact Zones: Prioritize areas affecting daily well-being (bedroom air quality, primary kitchen surfaces). A $20 hygrometer can prevent costly moisture issues later.
3. Effective DIY: Enzymatic cleaners for biological residues, oxygen bleach for grout, vinegar for drains—these often outperform expensive sprays.
4. Phased Approach: Invest in a quality dehumidifier before an air purifier if humidity is the root cause. Replace HVAC filters regularly ($10) before purchasing standalone purifiers.
Perspective: Prevention is typically more economical than remediation. Spending modestly on caulk to seal a window gap may prevent significant moisture damage later.
Your Questions, Answered
Q: Does baking soda really eliminate odors, or is it a myth?
A: Baking soda (sodium bicarbonate) effectively adsorbs certain airborne acidic odors (like sour milk or smoke) in enclosed, low-airflow spaces (refrigerator, closet). It neutralizes acids through a mild chemical reaction. However, it does not eliminate odors embedded in carpets, upholstery, or drains—it lacks enzymatic or oxidative action. Its accessibility makes it useful for specific scenarios: place an open box in the fridge; sprinkle on carpets before vacuuming. For deep-set residues, enzymatic or oxygen-based cleaners are more appropriate.
Q: Is vinegar safe for all surfaces? What shouldn’t I use it on?
A: Vinegar’s acidity (pH ~2.5) makes it useful for cutting grease, dissolving mineral deposits, and neutralizing alkaline residues. However, it can damage:
– Natural stone (marble, granite, limestone): May etch polished surfaces.
– Hardwood floors: Can degrade finishes over time; use pH-neutral wood cleaners.
– Wax-coated surfaces: Strips protective wax.
– Electronics/screens: Moisture and acidity pose risks.
– Cast iron: Removes seasoning.
Always test in an inconspicuous area first. For stone or finished wood, consider hydrogen peroxide (3%) or manufacturer-recommended cleaners.
Q: Why do my clothes smell musty even after washing?
A: This typically stems from moisture trapped in the washing machine (especially front-loaders) or damp clothes sitting too long before drying. Bacteria thrive in dark, wet environments. Solutions: Wipe door gasket and detergent drawer after every load. Leave door ajar between cycles. Run a monthly empty maintenance cycle with washer cleaner or vinegar. Never let wet clothes sit >30 minutes. Use recommended detergent amount (HE machines often need less). Add 1 cup vinegar to the rinse cycle—it helps neutralize residues and removes detergent buildup that traps odors.
Q: Are “natural” odor removers (like essential oils) effective?
A: Essential oils (tea tree, eucalyptus) have mild antimicrobial properties but do not eliminate odor sources. They primarily mask smells with stronger fragrances—a temporary sensory override. Oils can leave residues that attract dirt or damage surfaces (plastics, finished wood). Some (citrus) degrade in sunlight. For true resolution, rely on proven mechanisms: enzymes for organics, oxidation for residues, adsorption for airborne particles. If using oils for ambiance, diffuse after source treatment, never as the primary solution.
Q: How long does it take for enzymatic cleaners to work on pet urine?
A: Enzymes require time and moisture to digest organic matter. For fresh accidents: Saturate area, keep moist for 10–15 minutes (cover with plastic wrap), then air dry (do not wipe). Full neutralization occurs as it dries (1–2 hours). For older residues: Multiple applications over 24–48 hours may be needed. Critical factors:
– Surface must stay moist during dwell time.
– Temperature: Works best at room temperature (68–85°F / 20–30°C).
– No prior chemical cleaners: Residues can deactivate enzymes. Always blot first with water only.
Patience is essential—rushing leads to reactivation when moisture returns.
Q: Can air purifiers alone solve persistent odors?
A: Air purifiers are support tools, not primary solutions. HEPA filters capture particles (dander, spores) but not gaseous odors. Charcoal filters adsorb gases but saturate over time (replace per manufacturer). Crucially, purifiers cannot address the source—a damp wall or dirty drain will keep emitting odors faster than the purifier can clean the air. Use purifiers after source treatment to maintain air quality, especially in bedrooms. Match CADR rating to room size; undersized units have limited impact.
Q: Is it safe to mix vinegar and hydrogen peroxide for stronger cleaning?
A: Never mix vinegar and hydrogen peroxide in the same container. While using them sequentially (vinegar first, rinse thoroughly, then peroxide) is generally safe for drains, combining them creates peracetic acid—a corrosive compound that can irritate skin, eyes, and lungs. Similarly, never mix vinegar and bleach (creates chlorine gas) or bleach and ammonia (creates chloramine gas). When uncertain, use one product at a time with thorough rinsing between applications. Prioritize ventilation and read all product labels.
Q: Why does the “wet dog” smell happen, and how do I prevent it?
A: The smell isn’t from water itself—it’s bacteria and yeast naturally present on skin and fur. Water activates these microbes, causing them to release volatile compounds (mVOCs). Prevention focuses on reducing microbial load:
– Bathe pets regularly with veterinarian-recommended shampoo (over-bathing can strip natural oils).
– Thoroughly dry fur after baths/swimming—use towels, then low-heat blow dryer if tolerated.
– Brush frequently to remove dead hair/dander where microbes thrive.
– Wipe paws and belly with pet-safe wipes after walks in damp areas.
– Discuss omega-3 fatty acid supplements with your vet—may support skin health.
For immediate relief: Sprinkle cornstarch on dry fur, massage in, brush out—it absorbs oils and moisture.
Q: How do I address cigarette smoke smell in a newly purchased home?
A: Smoke residue permeates paint, drywall, carpets, and ducts. Surface cleaning alone is insufficient. A multi-step approach is recommended:
1. Deep Clean: Wash all walls, ceilings, windows with TSP substitute. Clean light fixtures, outlets, switches.
2. HVAC: Install new filters. Consider professional duct inspection/cleaning.
3. Seal Surfaces: Apply odor-sealing primer (Kilz Restoration) to walls, ceilings, and subfloors before repainting. This helps block off-gassing.
4. Soft Goods: If budget allows, replace carpets, padding, and heavy drapes—they deeply absorb residues.
5. Ventilation: Keep windows open during renovation. Use fans to exhaust air outward.
Note: Ozone treatments are controversial—effective only at hazardous concentrations and can damage materials. Primer sealing is widely regarded as the most reliable DIY step. For significant contamination, consult restoration professionals.
Q: What’s the difference between mold and mildew, and does it matter for odor removal?
A: Mildew is a type of surface-level fungi (often grayish-white on shower tiles). “Mold” refers to deeper-penetrating fungi (black, green, orange) growing into porous materials. Both produce musty mVOCs, but remediation differs:
– Mildew: Often cleanable with oxygen bleach or hydrogen peroxide on non-porous surfaces.
– Mold: May require removal of contaminated material (e.g., cutting drywall), antimicrobial treatment of surrounding areas, and moisture source correction.
Why it matters: Treating deep growth like surface mildew leaves roots intact, leading to regrowth. If growth is fuzzy, discolored beyond the surface, or covers >10 sq ft—consult a qualified professional. Never sand visible growth—it aerosolizes spores.
Conclusion and Next Step
Odor management is not a single task but an ongoing dialogue with your home’s environment. You now hold the ROOT Framework: Recognize the true source through mindful diagnosis, Obliterate it with chemistry-informed precision, Overcome residual particles through strategic renewal, and Transform daily habits to support lasting freshness. This approach replaces frustration with informed action—turning every lingering smell into a solvable cue rather than a source of stress. Remember the core insight reiterated throughout: masking offers temporary relief; addressing the source delivers enduring results. Your senses are valuable guides. Listen with curiosity, not concern.
Recap: Three Foundational Principles
- Source Over Symptom: Never treat the smell without identifying its origin. A dry P-trap requires water, not bleach. Uric acid crystals require enzymatic action, not vinegar alone.
- Chemistry-Informed Action: Match your method to the contaminant’s nature—enzymes for biological residues, oxidation for stains, adsorption for airborne particles. Informed choices prevent wasted effort.
- Prevention Through Practice: Freshness emerges from consistent micro-habits—squeegeeing the shower, monitoring humidity, maintaining the disposal. These small, repeated actions create a resilient home environment.
The 24-Hour Rule: Your Immediate Action
Within the next 24 hours, complete one targeted action using the ROOT Framework:
– If you have pets: Locate one common accident spot. Clean it today using the enzymatic protocol (blot, saturate, cover, air dry). Place a deterrent nearby.
– If humidity is a concern: Place a hygrometer in your basement or problem room. If reading exceeds 60%, run a dehumidifier for a few hours and note the change. Empty the tank.
– If kitchen odors linger: Clean your garbage disposal now with the baking soda/vinegar/ice method. Wipe the rubber splash guard with a vinegar-soaked cloth.
This single step breaks the cycle of avoidance and builds momentum. Progress, not perfection, is the goal.
The Bigger Picture: Your Home as a Dynamic System
Your house responds to weather, occupancy, materials, and care. Odors are feedback—signals about ventilation, moisture, material choices, and routines. By learning this language, you move beyond reactive cleaning to proactive stewardship. You cultivate a space where air quality supports well-being, surfaces reflect attentive care, and every room feels genuinely welcoming. This mindset extends beyond odors: it fosters deeper awareness of your home’s needs, potentially preventing larger issues, supporting health, and nurturing pride in your sanctuary. The journey to a truly fresh home is continuous, but with the ROOT Framework as your guide, you possess clear, actionable steps to meet each challenge with confidence and care.
Explore Our Complete Home Care System:
Mastering Humidity Control: A Room-by-Room Guide to Preventing Mold and Mustiness | The Ultimate Deep Cleaning Calendar: Seasonal Tasks for a Healthier Home | DIY Ventilation Upgrades: Simple Fixes to Improve Airflow Without Renovations | Choosing Safe Cleaning Products: Decoding Labels and Avoiding Toxic Mixes | Pet-Proofing Your Space: Smart Solutions for Harmony Between Humans and Animals