A room-by-room, values-centered approach to creating a home that supports dignity, autonomy, and joy across all stages of life—thoughtfully designed, financially mindful, and deeply human.
Imagine moving through your home with quiet confidence. Reaching kitchen shelves without strain. Stepping securely into a shower designed for stability. Navigating hallways illuminated just enough to prevent missteps. This isn’t reserved for new construction or major renovations—it’s the tangible outcome of intentional, incremental modifications grounded in universal design. Supported by principles endorsed by occupational therapy associations and accessibility standards worldwide, this guide transforms concern into clarity. Research suggests environmental adjustments can significantly reduce fall risks and support continued independence, easing emotional weight for both residents and families. This journey isn’t about anticipating decline; it’s about honoring present capability while gently preparing for evolving needs—without sacrificing aesthetics, personal meaning, or financial well-being.
Introduction: Redefining Aging in Place—Beyond Grab Bars and Ramps
When many hear “aging in place modifications,” clinical imagery arises: institutional grab bars against floral wallpaper, steep ramps dominating front yards. These fragmented solutions reflect an outdated reactive mindset—changing the home after a crisis occurs. Today’s approach is fundamentally different: proactive, holistic, and deeply human-centered. Aging in place is not merely a housing strategy; it is a commitment to dignity and continuity. Surveys consistently indicate that a strong majority of adults over 65 express a preference to remain in their current homes long-term. Simultaneously, data highlights that environmental factors contribute significantly to household incidents. The gap between aspiration and reality isn’t about willpower—it’s about accessible, compassionate knowledge. This guide bridges that gap. We move beyond isolated product lists to present a cohesive, evidence-informed framework drawn from universal design philosophy, occupational therapy practice, and housing accessibility standards. These principles benefit everyone: a parent carrying groceries with a child, someone recovering from surgery, or a visitor using temporary mobility support. By designing for the full spectrum of human ability, we create homes that are inherently safer, more intuitive, and deeply respectful. This journey begins not with tools or budgets, but with perspective: your home should serve you, adaptively and gracefully. Let’s rebuild that relationship, room by thoughtful room.
The Three-Layer Framework: Foundation, Flow, and Flourish
Overwhelming checklists lead to paralysis. Sustainable aging-in-place success follows a strategic sequence. Installing a stairlift before addressing slippery bathroom surfaces creates misplaced confidence. The Three-Layer Framework ensures modifications build logically, cost-effectively, and with emotional intelligence. Developed through synthesis of established accessibility guidelines and occupational therapy practice patterns, this method prioritizes high-impact, low-disruption changes first. It transforms uncertainty into agency—one deliberate layer at a time. Note: Individual needs vary. Consult qualified professionals for personalized assessments.
Layer 1: Foundation—Essential Safety Anchors
Foundation modifications address immediate environmental hazards. These elements form a critical baseline for safety, often low-cost, and frequently overlooked because they seem simple. Think of this layer as your home’s foundational support: invisible when functioning well, critically important when absent.
Why begin here? Environmental assessments consistently identify bathrooms, kitchens, and transition zones as common locations for household incidents, often linked to lighting, surface stability, or pathway clarity. Establishing this baseline before larger projects ensures safety during any future work and creates immediate peace of mind. Proceeding without this layer may introduce avoidable risk.
Key Actions & Nuanced Execution:
– Trip Hazard Mitigation: Move beyond “remove throw rugs.” Inspect transitions between flooring types (e.g., hardwood to tile). Even small height variations can pose risks. Solutions: Use color-matched reducer strips, low-profile transition molding, or gently sand and seal minor threshold edges. Budget consideration: High-tack double-sided tape under rug edges (inspect and replace periodically). Temporary cue: Subtle contrasting tape along threshold edges to enhance visibility until a permanent solution is feasible.
– Strategic Lighting Approach: Ambient light alone is often insufficient. Consider a layered approach: ambient (ceiling), task (under-cabinet), and pathway lighting. In hallways and stairwells, motion-activated LED strips along baseboards or under handrails provide gentle guidance. For bedrooms, smart plugs can enable bedside lamps to activate at low brightness overnight, rising to full illumination upon motion detection. Important nuance: In rest areas, warmer color temperatures (2700K–3000K) with high color rendering (CRI >90) support accurate color perception (helpful for medication identification) and minimize circadian disruption. Common consideration: Over-lighting can create glare on reflective surfaces. Test placements from both seated and standing perspectives.
– Pathway Clearance Assessment: Measure primary routes (bedroom to bathroom, kitchen to living area). A clear width of approximately 32 inches is often recommended for accessibility. If existing doorways are narrower, options include offset hinges (gaining incremental width), pocket doors (where structurally feasible), or adjusting swing direction. Practical insight: Hollow-core doors are lighter to operate than solid-core, which may benefit those with limited grip strength. For thresholds, low-profile sweeps (<½ inch) reduce tripping potential. Illustrative example: A homeowner avoided a full bathroom remodel by installing offset hinges on the bathroom door—a modest investment yielding immediate functional improvement for walker use.
The Guiding Insight: True safety integrates seamlessly into daily life. The most effective modification supports you quietly, consistently, and without drawing attention—until its presence makes all the difference.
Layer 2: Flow—Optimizing Movement and Daily Rituals
With foundational safety in place, Flow modifications refine how you interact with your space during routine activities: preparing meals, bathing, dressing, resting. This layer conserves physical and cognitive energy for what matters most. Flow is deeply personal—it reflects your rhythms, body mechanics, cherished routines, and emotional connections to spaces. A kitchen adjustment ideal for daily baking may not suit someone who primarily reheats meals. This layer invites observation, not assumption.
Why Flow follows Foundation: Attempting Flow enhancements without foundational safety is like optimizing a vehicle’s performance while neglecting tire integrity. Foundation work establishes the secure base; Flow personalizes the experience. Occupational therapy practice emphasizes “activity analysis”—breaking down tasks to identify subtle friction points. We adapt this lens for mindful home assessment.
Room-by-Room Flow Considerations:
Bathroom: A Space of Privacy and Precision
Bathrooms concentrate multiple nuanced activities on potentially unstable surfaces.
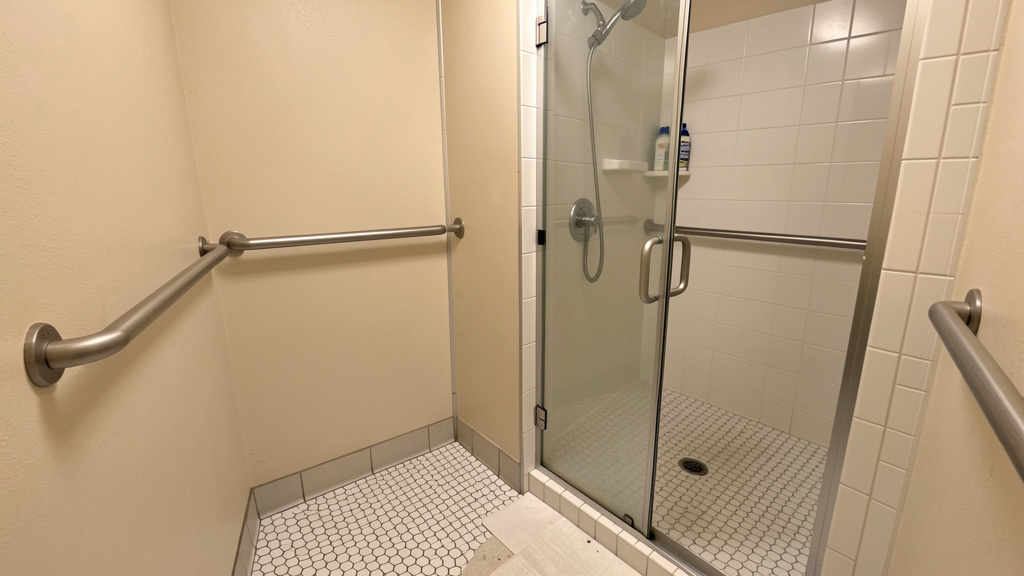
– Shower Adaptation: Curbless (zero-threshold) showers offer ideal accessibility but require structural planning. Phased approach: Begin with a textured, non-slip mat secured with dual methods (suction cups plus discreet adhesive dots to prevent edge curling). Install a wall-mounted, fold-down bench (teak or composite for warmth and water resistance), anchored securely to wall studs. Key detail: Position the bench so the user faces controls when seated, minimizing twisting. For handheld showerheads, select models with magnetic docking and an adjustable slide bar. Budget path: Replace standard curtains with weighted-bottom liners; set tension rods slightly higher than the tub rim to reduce tripping risk. Add a suction-cup caddy within easy reach. Style integration: Grab bars now come in finishes like brushed nickel, matte black, or oil-rubbed bronze. Some double functionally as towel bars. Install vertically near the toilet (for leverage when rising) and horizontally in the shower (for stability). Placement tip: While seated on the closed toilet lid, your hand should rest naturally on the bar without straining.
– Toilet Accessibility: Standard seat heights may require deep knee flexion. Options include elevated seats with secure locking mechanisms (adding 3–4 inches) or replacing the fixture with a “comfort height” model (17–19 inches). Essential companion: Install grab bars—one horizontal beside the toilet, one vertical behind. Nuance: The vertical bar assists standing; the horizontal bar supports controlled sitting. A slight downward angle (approximately 5 degrees) on the horizontal bar may align better with natural arm movement. Consideration: Freestanding safety frames can shift on uneven floors and complicate cleaning; wall-mounted solutions are generally preferred where feasible.
– Sink & Mirror Strategy: Achieving knee clearance may involve removing base cabinet doors or selecting a wall-hung vanity. Temporary solution: A portable, height-adjustable caddy allows face washing or toothbrushing while seated. For mirrors, tilting models or swing-arm magnifiers provide flexible viewing angles. Lighting insight: Vertical sconces placed beside the mirror (rather than above) reduce facial shadows—valuable for grooming, skincare, or monitoring health changes.
Kitchen: The Energy Conservation Zone
Fatigue during cooking often stems from layout inefficiencies, not diminished strength alone.
– Rethinking the Work Zone: Adapt the traditional “work triangle.” Create a dedicated seated station: lower a 24-inch counter section to 32–34 inches with knee clearance. Store frequently used items (mug, coffee, spices) in pull-out drawers at this station. Budget consideration: A sturdy, height-adjustable drafting stool with back support and robust casters can serve this purpose when tucked under the counter.
– Cabinet & Drawer Enhancements: Replace small knobs with D-shaped or loop pulls for easier gripping. Soft-close hinges prevent pinched fingers. For upper cabinets, spring-loaded turntables (“lazy Susans”) or pull-down shelving systems improve access. Safety note: Relocate heavy items (cast iron, glassware) to base cabinets with full-extension slides. Illustrative scenario: An individual resumed a cherished baking ritual after adding an oven rack puller tool and relocating baking sheets to an accessible lower drawer—addressing a specific friction point without major renovation.
– Appliance Selection: Ranges with front-mounted controls reduce reaching over hot surfaces. Position microwaves at elbow height (within a wall cabinet, not above the range). French-door refrigerators with bottom freezers minimize deep bending. Insight: Appliances with simplified control panels (sometimes found in “Sabbath mode” features) can also support users experiencing cognitive shifts.
Bedroom & Hallways: Supporting Rest and Transition
Sleep quality and nighttime safety are deeply interconnected.
– Bed Height Assessment: When seated on the mattress, feet should rest flat with knees near a 90-degree angle. Adjust using low-profile frames, removing box springs, or secure bed risers. Essential addition: Motion-activated LED strips under the bed frame illuminate the floor path softly without disrupting sleep cycles.
– Closet Adaptation: Lower primary hanging rods to approximately 48 inches. Install pull-down rods for upper sections. Replace deep shelves with shallow, labeled bins on full-extension slides. Budget solution: Over-the-door organizers with clear pockets offer visible, seated-access storage for smaller items.
– Hallway & Stairway Considerations: Handrails running continuously on both sides of stairs, extending slightly beyond the top and bottom steps, provide consistent support. Diameter around 1.25–1.5 inches typically fits the palm comfortably. Critical detail: Rail ends should return smoothly to the wall or floor to avoid catching clothing. In hallways, a secondary rail at a lower height may support seated transfers. Visual cue: Applying a subtly contrasting strip along the edge (nosing) of stair treads can enhance depth perception. Non-slip treatment is best applied only to the nosing to avoid creating an uneven surface across the entire tread.
Layer 3: Flourish—Personalization, Connection, and Joy
Flourish modifications nurture emotional well-being, social connection, and future adaptability. This layer answers: “How does this home reflect who I am?” and “How can it continue to support my spirit?” Flourish is where aging-in-place transcends physical safety to become deeply fulfilling. It transforms a functional space into a true sanctuary. Research in gerontology underscores that environments reflecting personal identity and autonomy positively influence emotional health. This layer emerges naturally after Foundation and Flow are thoughtfully addressed.
Dimensions of Flourish:
Biophilic Integration (Nature Connection):
Humans often experience reduced stress and enhanced well-being through connection with nature.
– Indoor Greenery: Select low-maintenance plants like snake plants (air-purifying, drought-tolerant) or pothos (trailing vines visible while seated). Self-watering pots with clear reservoirs eliminate heavy lifting and provide visual cues. Safety note: Verify plant safety if cognitive changes are present; avoid species with toxic properties.
– Window Engagement: Ensure comfortable seating offers unobstructed views. Lever-style window locks are often easier to operate than twist knobs, encouraging fresh air. Sheer roller shades diffuse harsh light while preserving visibility. Insight: Position seating perpendicular to the window to reduce glare while enjoying the outlook.
– Natural Textures: Incorporate warm, tactile elements: a rug with non-slip backing, a wooden tray for bedside items, smooth stones in a bowl. These subtle cues signal comfort and sanctuary to the nervous system.
Thoughtful Technology (Supportive, Not Intrusive):
Technology should simplify daily life, not add complexity. Prioritize intuitive, “set-and-forget” systems.
– Voice-Activated Assistance: Devices like Amazon Alexa or Google Home can manage lights, thermostats, or reminders. Implementation tip: Create simple routines (“Good morning” triggers soft lights and weather update). Privacy consideration: Place devices thoughtfully; utilize physical mute buttons. Discuss setup openly with family.
– Passive Monitoring Options: Sensor-based systems (ceiling-mounted, non-camera) can detect unusual inactivity patterns and notify designated contacts. Ethical imperative: Transparency is essential. Frame this as “providing peace of mind for loved ones,” not surveillance. Consent and ongoing dialogue are foundational.
– Medication Support: Automated dispensers provide alerts and tracking. Budget alternative: A weekly pill organizer with large, color-coded compartments paired with a smartphone reminder app (with family backup notification). Habit anchor: Place the organizer near an established routine cue—like the coffee maker or toothbrush.
Adaptable Aesthetics (Beauty and Function in Harmony):
Accessibility and personal style coexist beautifully. The goal: modifications that feel intentional, not institutional.
– Grab Bars as Design Elements: Select finishes that complement existing hardware. A horizontal bar in the shower can double as a towel holder using matching brackets. In hallways, continuous rails crafted from warm wood (like oak) with ergonomic shaping blend function and warmth.
– Purposeful Contrast: Use contrast to define edges clearly, not create visual chaos. Paint stair nosings a shade noticeably darker than treads. Choose a toilet seat in a contrasting color to the bowl. Practical tip: View color choices at different times of day—lighting conditions change perception. Avoid high-contrast floor patterns (like checkerboards), which can be misinterpreted visually.
– Meaningful Anchors: Hang cherished artwork at seated eye level (approximately 48–54 inches to center). Create a labeled “memory wall” with photos of loved ones—supporting recognition and connection. Use warm LED picture lights to highlight without glare.
Navigating Financial Pathways: Realistic Costs, Resources, and Phased Planning
Concern about cost is a common barrier to beginning modifications. Headlines citing extensive renovation costs can feel paralyzing. However, data from community-based housing programs indicates that many critical safety enhancements are achievable at modest price points. This section provides transparent context, legitimate resource pathways, and a compassionate phased approach. Knowledge transforms overwhelm into empowered, incremental action.
Contextual Cost Considerations (U.S. National Averages)
| Modification | Budget Range | Mid-Range | Premium/Structural | Notes |
|---|---|---|---|---|
| Bathroom | ||||
| Non-slip mats, grab bars (2), handheld shower | $150–$300 | — | — | Materials only; professional installation recommended for grab bars |
| Comfort-height toilet + elevated seat | $200–$400 | $400–$700 | — | Unit cost; installation varies |
| Roll-in shower conversion | — | $8,000–$15,000 | $15,000–$30,000+ | Involves structural work, drainage, finishes |
| Kitchen | ||||
| Cabinet pulls, under-cabinet lighting | $100–$250 | — | — | Hardware and LED tape lights |
| Pull-down shelving system (2 cabinets) | — | $300–$600 | — | Hardware and installation |
| Countertop section lowered (24″) | — | $1,200–$2,500 | $2,500–$5,000 | Cabinet modification, new segment |
| Whole Home | ||||
| Lever-style door handles (entire home) | $200–$500 | — | — | 8–10 handles; DIY feasible |
| Stair handrails (both sides) | — | $800–$1,500 | $1,500–$3,000 | Materials and professional installation |
| Smart lighting system (10 bulbs + hub) | $150–$300 | $300–$600 | — | Bulbs, hub, setup |
Source: Synthesized from NAHB CAPS program resources, HomeAdvisor 2023 data, and Rebuilding Together project documentation. Costs vary significantly by region, home age, labor rates, and material choices. Always obtain multiple detailed quotes. These ranges are illustrative, not guaranteed.
Legitimate Resource Pathways (U.S. Context)
Public Programs:
– Medicare: Generally does not cover structural home modifications. It may cover certain durable medical equipment (DME) like hospital beds if deemed medically necessary by a physician and meeting specific criteria. Clarify directly with Medicare.
– Medicaid Home and Community-Based Services (HCBS) Waivers: A primary public funding source for eligible individuals. Waivers vary by state but may cover bathroom modifications, ramps, or stairlifts. Action step: Contact your State Medicaid Agency or Area Agency on Aging (via eldercare.acl.gov). Inquire: “What HCBS waivers in my state support home modifications, and what are the eligibility criteria?” Important note: Waiting lists can be lengthy. Inquire proactively. A physician’s letter documenting medical necessity may support applications.
– Veterans Affairs (VA): The Specially Adapted Housing (SAH) grant assists veterans with service-connected disabilities. The Home Improvements and Structural Alterations (HISA) program covers smaller modifications; eligibility and copays vary. Action step: Consult a VA social worker or visit va.gov/housing-assistance.
– Local & Nonprofit Resources: Many municipalities offer low-interest loans, grants, or volunteer labor programs through Offices on Aging. Organizations like Rebuilding Together provide critical safety modifications for income-qualified homeowners. Search tip: “[Your City] aging in place assistance” or “[Your County] home modification program.”
Financial Considerations & Professional Guidance:
– Tax Implications: IRS Publication 502 outlines potential medical expense deductions for modifications primarily for medical care (with physician documentation), minus any increase in home value. Rules are complex; consult a qualified tax advisor.
– Insurance Review: Examine long-term care insurance policies for “home modification” or “adaptive equipment” riders. When purchasing new policies, inquire specifically about this coverage.
– Home Equity Options: Reverse mortgages (HECM) or home equity loans/lines of credit may be options for some. Strong recommendation: Consult a HUD-certified housing counselor (hud.gov) before proceeding to fully understand implications, fees, and suitability for your situation. Avoid solutions that create unsustainable financial strain.
The Phased Approach: Progress Over Perfection
You do not need significant funds upfront. Build momentum through intentional, manageable steps:
1. Week 1 ($50–$150): Foundation layer—install motion-sensor nightlights along the bedroom-to-bathroom path, apply non-slip strips in the tub/shower, replace two critical door knobs with lever handles (bedroom, bathroom).
2. Month 1 ($150–$400): Add securely mounted grab bars (professionally installed), under-cabinet kitchen lighting, reorganize cabinets to place heavy items at waist level.
3. Month 3 ($300–$800): Install comfort-height toilet seat, shower bench, smart plugs for bedside lamps.
4. Ongoing: Save incrementally for larger projects (roll-in shower, stairlift). Explore grant applications concurrently.
Psychological benefit: Each completed step builds confidence and demonstrates tangible progress. Maintain a simple “Home Progress Journal”—note what worked, what felt unnecessary. This becomes a valuable reference for future planning or discussions with professionals.
Navigating Common Realities: Practical Responses to Everyday Challenges
Even well-researched plans meet real-world complexities. Acknowledging these openly reduces frustration and supports sustained progress. Below are frequently encountered situations with empathetic, actionable considerations—drawn from documented practice in housing accessibility and occupational therapy.
“My Spouse/Parent Expresses Hesitation About Changes”
Modifications can unintentionally symbolize loss. Pushing often increases resistance; empathy builds bridges.
– Reframe with Values: Shift language from “for safety” to connection: “Let’s adjust the kitchen lighting so you can continue enjoying morning coffee and crossword puzzles comfortably,” or “This bench means you can keep tending your beloved window herbs without strain.” Link changes to preserving cherished activities.
– Collaborative Choice: Offer curated options: “Would you prefer the grab bar in brushed nickel to match your faucet, or matte black for better visibility?” Visiting a showroom together to see stylish, functional options reduces stigma.
– Start with Universal Upgrades: Begin with changes benefiting everyone: soft-close cabinet hinges (quieter, safer for grandchildren), motion-sensor path lights (convenient for pets or late-night needs). Frame them as “home improvements,” normalizing the process.
– Neutral Third Party: If hesitation persists, suggest a complimentary consultation from a university occupational therapy program (many offer community clinics) or a CAPS-certified professional. Hearing recommendations from an objective expert can carry significant weight. Frame it positively: “Let’s get expert input to protect your investment and comfort in this home you love.”
“I Rent My Home—What Options Exist Within Lease Constraints?”
Renters face unique considerations, yet meaningful safety gains are achievable.
– Understand Rights (U.S.): The Fair Housing Act permits “reasonable modifications” at tenant expense for disability-related needs. Restoration upon move-out may be required unless the change benefits future tenants (e.g., lever handles). Critical: Obtain written pre-approval from your landlord. Provide a physician’s note citing medical necessity if applicable. Propose reversible methods where possible.
– Renters-Friendly Solutions:
– Bathroom: Suction-cup grab bars (check weight limits daily; best for light support), non-slip adhesive strips in tub, portable shower chair.
– Doors: Clamp-on lever handle adapters that fit over existing knobs (no drilling).
– Lighting: Plug-in motion sensor lamps, smart bulbs in existing fixtures.
– Floors: Removable peel-and-stick non-slip stair treads (test in inconspicuous area first for residue).
– Documentation: Photograph the current condition before installing any item. Keep receipts. Upon moving out, restore original hardware and provide before/after photos. This builds trust and supports future requests.
“The Product Market Feels Overwhelming—How Do I Identify Reliable Options?””
Prioritize certifications, professional guidance, and realistic expectations.
– Grab Bars: Look for compliance with ANSI A117.1 standards. Reputable brands specify weight capacity and require mounting into wall studs for primary support. Suction-cup models are generally unsuitable for critical support during a slip; they may serve as light-touch guides. Consult a professional for installation.
– Ramps: For temporary needs, choose commercial aluminum ramps with non-slip surfaces and handrails. Slope should follow accessibility guidelines (approximately 1:12 ratio). Avoid improvised solutions like plywood—they can warp, splinter, or shift.
– Stairlifts: Require professional assessment. Key questions: Does the company provide in-home evaluation? What is the warranty scope? Is the track removable? Reputable manufacturers include Bruno, Harmar, and Acorn. Caution: Be wary of high-pressure sales tactics or refusal to provide written quotes.
– Trusted Resource: The National Association of Home Builders (NAHB) CAPS directory (nahb.org/caps) lists professionals trained specifically in aging-in-place modifications—they vet products and installation practices daily.
“How Do I Plan for Needs That May Evolve?””
Build flexibility into your approach from the start.
– Future-Proofing During Renovations: When modifying showers or walls, install wood blocking behind surfaces even if grab bars aren’t added immediately. This allows secure, simple installation later.
– Adaptable Furniture Choices: Select armchairs with firm, straight arms (easier to push up from) and seat heights around 18–20 inches. Avoid deep, sinking sofas.
– Designate Flexible Space: If possible, maintain one room (spare bedroom, den) with clear floor space (approximately 5-foot diameter) and reinforced walls. This space can later accommodate evolving needs without major reconstruction.
– Living Document: Keep a “Home Adaptation Notes” file with photos, product links, and observations. Review annually. When needs shift, you have a pre-vetted starting point—not a blank page.
Your Questions, Answered
Q: When is the right time to begin considering aging-in-place modifications?
A: The most effective time is proactively, regardless of current age or ability. Foundation layer actions—like improving lighting, securing rugs, or installing lever handles—benefit everyone and prevent incidents at any life stage. Think of it like maintaining a vehicle: small, consistent care prevents larger issues later. Many adults in their 50s and 60s implement subtle Flow enhancements (under-cabinet lighting, pull-out shelves) simply for convenience, naturally creating a more accessible home long before urgent needs arise. Starting early makes each step manageable and less disruptive.
Q: Are there modifications that could unintentionally reduce safety if implemented incorrectly?
A: Yes, proper implementation is crucial. Common considerations include:
– Installing grab bars solely into drywall without securing to wall studs can lead to failure under load. Always use a stud finder; if studs aren’t aligned, consult a professional about appropriate heavy-duty anchors.
– Using non-slip tape that blends with the surface color (e.g., dark tape on dark stairs) reduces its visibility as a cue. Contrast is key.
– Placing a loose rug over a threshold to “hide” it creates a significant tripping hazard. Address the threshold directly with a reducer strip.
When uncertain, a brief consultation with a CAPS-certified contractor or occupational therapist is a wise investment to ensure safety and effectiveness.
Q: How can I identify a trustworthy contractor experienced in aging-in-place needs?
A: Look for specific credentials and ask thoughtful questions:
– CAPS Designation: Seek contractors with the Certified Aging-in-Place Specialist credential from NAHB. Verify current status at nahb.org/caps.
– Occupational Therapy Collaboration: Ask if they routinely work with or accept recommendations from occupational therapists.
– Interview Questions: “Can you share examples of similar projects?” “How do you handle unexpected findings during work?” “What is your process for ensuring modifications meet the resident’s specific needs?” Avoid contractors who dismiss concerns or push expensive solutions without assessment.
– OT Referral: Request a home assessment from an occupational therapist (search AOTA’s directory). Their unbiased report provides clear recommendations you can share with contractors.
Q: What modifications support someone experiencing early-stage cognitive changes?
A: Focus on reducing confusion, supporting routine, and ensuring safety with dignity:
– Visual Cues: Use color contrast to define spaces (e.g., a distinct placemat for meals). Label cabinets clearly with words and simple images (“TEA,” “MEDS”).
– Wandering Prevention: Install keyed locks high on exterior doors (out of habitual reach), ensuring fire safety compliance (never lock bedroom doors from outside). Door alarms that chime when opened can provide alerts.
– Simplified Controls: Replace complex thermostats with large-button models. Use voice-controlled smart plugs for essential lights (“Alexa, turn on kitchen light”).
– Essential Partnership: Collaborate with healthcare providers and organizations like the Alzheimer’s Association (alz.org), which offers free, stage-specific home safety resources. Always observe the individual’s response to changes; avoid anything that increases agitation. Consent and comfort remain paramount.
Q: Will accessibility modifications negatively impact my home’s future resale value?
A: Thoughtfully executed universal design features often broaden a home’s appeal. Features like lever handles, zero-step entries, open floor plans, and well-lit spaces attract diverse buyers: young families, remote workers, individuals with temporary injuries, and other aging adults. Key strategies:
– Choose neutral, contemporary finishes (brushed nickel, matte black) over clinical styles.
– Avoid highly specialized, non-removable equipment unless essential.
– Document modifications positively in listings: “Safety-enhanced bathroom,” “Accessible main-floor layout.”
Market analysis suggests homes highlighting universal design features can attract strong interest. The perception of a “move-in ready, adaptable home” is increasingly valued.
Q: What is one impactful, low-cost step I can take today?
A: Install warm-white (2700K), dimmable motion-activated LED nightlights along the path from bed to bathroom. Place one near the bed (triggered when rising), one in the hallway, and one outside the bathroom door. Choose models under 50 lumens to avoid sleep disruption. This addresses a high-risk time for incidents with minimal cost (often under $30 for a multi-pack) and zero permanent installation. Brands like Vont or GE offer reliable plug-in or adhesive options. This small action delivers immediate reassurance and demonstrates how minor changes yield meaningful safety gains.
Q: How do modifications differ in multigenerational or culturally diverse households?
A: Prioritize shared spaces and inclusive design that honors all residents:
– Widen main doorways to approximately 36 inches to accommodate wheelchairs, walkers, and strollers.
– Incorporate dual-height counters in kitchens for collaborative cooking across abilities.
– Select consistent, slip-resistant flooring throughout main living areas to support both mobility aids and toddlers learning to walk.
– Involve all household members in planning discussions. A teen might suggest smart lighting controls; an elder might prioritize seating near the kitchen. Frame modifications as “enhancing our home for everyone’s comfort and connection.” Organizations like Generations United (gu.org) offer culturally responsive resources for multigenerational living.
Q: Beyond brighter lights, what supports low-vision needs?
A: Effective adaptation combines contrast, texture, consistency, and glare reduction:
– Edge Definition: Apply subtly contrasting tape (e.g., pale yellow on dark countertops, dark strip on light stair nosings).
– Tactile Markers: Use bump dots (small raised adhesive circles) on key appliance controls (microwave “start,” thermostat settings).
– Glare Management: Choose matte-finish countertops and tables; use sheer curtains to soften window light.
– Consistent Layout: Maintain stable furniture placement. Keep frequently used items in designated, labeled spots.
A consultation with a low-vision rehabilitation specialist (often available through state agencies or nonprofits) provides personalized strategies and may recommend task lamps with flexible arms or electronic magnifiers.
Q: What is the distinct role of an occupational therapist (OT) versus a contractor?
A: They provide complementary expertise:
– Occupational Therapist: Focuses on the person. They assess how an individual performs daily activities within their environment, recommend modifications based on physical, cognitive, and emotional needs, suggest adaptive techniques or equipment, and prioritize changes by functional impact.
– Contractor (CAPS-certified): Focuses on the space. They evaluate structural feasibility, advise on materials and methods, execute modifications safely and to code, and ensure installations are secure and durable.
Ideal collaboration: OT conducts assessment and provides written recommendations → Homeowner shares report with CAPS contractor → Contractor develops bid and implementation plan → OT may conduct a post-installation review. Many insurance plans cover OT home assessments with a physician referral.
Q: How can I sensitively discuss modifications with a fiercely independent parent?
A: Lead with respect, shared values, and partnership:
– Anchor in Their Values: “I admire how you’ve maintained this home. How can we ensure it continues to support your independence and comfort here for years to come?”
– Frame as Shared Concern: “When I think about you navigating the stairs at night, my hope is that you feel completely secure. Can we explore simple lighting options together?”
– Offer Collaboration, Not Pressure: “No decisions needed today. Could we spend 20 minutes looking at a few ideas online? I’d value your perspective.”
– Suggest Neutral Input: “Would you be open to having the handyman who fixed the porch take a quick, no-obligation look? He might have practical tips.”
Listen deeply. Resistance often stems from fear of losing autonomy. Reassure consistently: “This is about expanding your freedom and peace of mind in the home you love.”
Conclusion and Your Next Step
Aging in place is not a single project completed, but a continuous, compassionate practice of alignment between your evolving self and the space that shelters you. The Three-Layer Framework (Foundation, Flow, Flourish) offers a flexible compass—not a rigid map. Your path will be uniquely shaped by your home’s character, your body’s wisdom, your cherished routines, and your deepest values. Hold gently to this core truth, echoed across gerontology and design: the goal is not perfection. It is meaningful progress. It is replacing one moment of strain with one moment of ease. It is the quiet confidence of moving through your home with dignity. It is the profound gift of peace of mind—for yourself and those who care for you.
Three Anchors for Your Journey
- Safety Builds Sequentially: Foundation layer work—trip hazard reduction, strategic lighting, clear pathways—creates the essential baseline. This layer makes subsequent enhancements both safer and more effective.
- Flow Honors Your Reality: Optimize spaces around your specific rituals and joys. A modification that supports what you love is inherently more sustainable than a generic checklist item.
- Flourish Nurtures the Spirit: Weave in beauty, nature, memory, and personal meaning. A home that feels authentically yours—warm, welcoming, and reflective of your story—is a sanctuary that sustains well-being through every season.
The 24-Hour Invitation: One Small Step Toward Clarity
Within the next day, complete this gentle, specific action:
Walk the path from your bed to your bathroom in low light (as you would during the night). Notice without judgment. Jot down just one observation.
Examples: “The hallway switch is hard to locate in the dark,” or “The bathmat shifts slightly when I step out.” This is not about fixing it today. It is about shifting from passive concern to active, compassionate awareness. That single note is your authentic starting point. Tomorrow, you might explore one simple solution for that one item. Momentum begins with microscopic, intentional clarity.
A Ripple of Thoughtfulness
When you thoughtfully adapt your home, you do more than secure your own comfort. You model empathy. You demonstrate to neighbors, friends, and family that aging is a natural phase to be met with creativity, respect, and care—not fear or concealment. You contribute to a quiet cultural shift—one where homes embrace human diversity, where independence is supported without stigma, and where every person can age with grace in the place they call home. This work carries meaning far beyond your four walls. It is an act of quiet, enduring compassion.
Explore Our Complete System:
Designing Dignity: Universal Design Principles for Every Home | The Caregiver’s Compass: Supporting Aging Parents With Balance and Boundaries | Light as Medicine: Optimizing Home Lighting for Vision and Wellness | Financial Pathways: Navigating Home Modification Resources with Confidence | The Mindful Home Assessment: A Room-by-Room Guide to Safety and Joy | Beyond the Threshold: Creating Welcoming, Accessible Outdoor Spaces | Partnering With Professionals: Understanding OT Assessments and CAPS Contractors