Preserve your home’s integrity through mindful, science-informed routines—without perfectionism or overwhelm. A compassionate, room-by-room guide to working with your home’s natural rhythms.
Your home responds continuously to the subtle patterns of daily life. From how moisture accumulates after a shower to the grit tracked across floors, seemingly minor routines create cumulative effects over time. This guide illuminates the quiet connections between everyday actions and long-term home care. Grounded in material science principles and preservation best practices, it offers adaptable strategies to nurture your living space—honoring both your home’s needs and your human reality. No shame, no extremes: just clear-eyed awareness and practical steps that fit real life.
Introduction
Homes rarely fail from single dramatic events. More often, wear emerges slowly through repeated micro-interactions—water lingering on a countertop seam, humidity pooling behind furniture, abrasive particles grinding into floor finishes. These aren’t moral failures or signs of neglect. They’re natural outcomes of living in dynamic environments where materials respond predictably to environmental pressures. Understanding this shifts preservation from a burden of vigilance to a practice of alignment. When we recognize how wood, stone, drywall, and sealants interact with moisture, temperature, and use, we make informed choices that support resilience. This perspective draws from established building science principles and decades of observed maintenance patterns across diverse home types and climates. Preservation isn’t about sterile perfection; it’s about cultivating a respectful partnership with the space that shelters you—a space that, in turn, reflects the care woven into ordinary moments.
The Preservation Mindset Framework: Awareness, Adaptation, Assessment
True preservation begins not with a checklist, but with a shift in perspective. Your home functions as an interconnected system where air, moisture, materials, and human activity continuously interact. This framework offers three gentle pillars to guide sustainable habits—designed to work with human behavior, not against it.
Pillar 1: Awareness (Understanding Material Responses)
Every surface and system in your home has inherent physical properties. Wood expands and contracts with humidity shifts. Natural stone reacts to acidic substances. Sealants fatigue under constant moisture exposure. Awareness means observing how daily actions interface with these properties. For instance, leaving a damp sponge on a countertop isn’t merely “messy”—it creates a localized microclimate where moisture migrates into microscopic pores, potentially accelerating surface degradation over repeated cycles. This isn’t alarmism; it’s physics. Material science consistently shows that repeated exposure to incompatible conditions—like moisture on unsealed stone or abrasives on finished wood—gradually reduces service life. Awareness transforms routine actions into conscious choices, revealing where small adjustments yield disproportionate protection.
Pillar 2: Adaptation (Designing Frictionless Routines)
Willpower alone rarely sustains change. Lasting habits thrive when embedded into your environment. Adaptation focuses on reducing effort for protective actions while gently increasing friction for high-impact risks. Examples:
– Place microfiber cloths inside kitchen drawers (not under the sink) so wiping spills becomes effortless.
– Install a small tray beside the entry door for wet shoes—making removal the path of least resistance.
– Pair running the bathroom fan with an existing habit: “When I hang my towel, I switch on the fan.”
This approach honors behavioral science: we succeed not by trying harder, but by designing supportive contexts. Adaptation is deeply personal—what works in a compact urban apartment may differ from a rural home with mudroom access. The goal is progress, not uniformity.
Pillar 3: Assessment (Gentle, Non-Intrusive Monitoring)
Preservation requires observation, not obsession. Schedule two brief weekly check-ins:
– Moisture scan (5 minutes): Glance under sinks, around window frames, and in basement corners. Notice discoloration, soft spots, or musty odors.
– Airflow scan (5 minutes): Ensure vents are unobstructed, filters appear clean, and exhaust fans operate smoothly.
Seasonal touchpoints deepen this practice: inspect rooflines after heavy storms, clean gutters before rainy seasons, check window seals before temperature extremes. Assessment cultivates agency—you’re not waiting for problems, but actively stewarding your space with calm attention. Trust your senses: Does air feel unusually damp? Do floorboards sound different near water sources? These subtle cues matter.
The Guiding Insight: Sustainable home preservation emerges from aligning daily actions with material needs—where awareness informs gentle adaptation, and consistent micro-assessment builds lasting confidence.
This framework rejects shame-based messaging. It invites curiosity: How might this small adjustment support my home’s longevity? Now, let’s explore practical applications room by room, with options for varying lifestyles, budgets, and home types.
Kitchen: Navigating Daily Stressors with Intention
Kitchens endure thermal shifts, moisture exposure, and mechanical wear. Small adjustments here create outsized protection.
Habit 1: Leaving Wet Items on Countertops
Why it matters:
Water acts as a solvent and transport medium. When damp sponges, dishrags, or cutting boards rest on surfaces, capillary action draws moisture into microscopic pores. On porous materials like natural stone or wood, this may contribute to:
– Surface etching or discoloration from prolonged moisture exposure
– Microbial growth in dark, damp zones beneath items
– Gradual weakening of adhesives or substrates beneath countertops
Real-world pattern:
A homeowner in a humid climate noticed faint discoloration on their countertop after several months. Investigation revealed consistent placement of a wet dishrag in the same spot. Early intervention—adjusting placement and ensuring surfaces dried fully—prevented deeper issues.
Adaptable solutions:
– Ideal: Install a dedicated sponge caddy inside the sink basin. Store cutting boards vertically in a ventilated rack.
– Budget-friendly: Repurpose a small ceramic tile as a designated “wet zone” coaster beside the sink.
– Space-conscious: Keep a compact microfiber cloth folded near the faucet for quick wipe-downs.
– If forgotten: Make “kitchen reset” part of your post-dish routine—spend 30 seconds ensuring surfaces are dry.
Gentle repair note:
For light surface marks on stone: A paste of baking soda and water applied gently with a soft cloth may help. Always test cleaners in an inconspicuous area first. Avoid acidic substances like vinegar on natural stone. For persistent concerns, consult a surface care professional.
Habit 2: Inconsistent Range Hood Use During Cooking
Why it matters:
Cooking releases moisture, grease particles, and airborne compounds. Without active ventilation:
– Grease settles invisibly on cabinets and walls, attracting dust and potentially affecting finishes over time
– Humidity penetrates wall seams, especially near exterior walls in cooler climates
– Wood cabinetry may experience subtle swelling or hinge stress from repeated moisture exposure
Important nuance:
Recirculating hoods (with charcoal filters) primarily address odors but do not remove moisture or grease particles. External venting is generally recommended for gas ranges due to combustion byproducts. When renovating or upgrading, discuss ventilation options with a qualified HVAC professional.
Adaptable solutions:
– Ideal: Install a humidity-sensing fan that activates automatically and runs briefly after cooking ends.
– Budget-friendly: Place a small visual cue (like a discreet icon) near the stove light switch—a gentle reminder linked to an existing habit.
– Behavioral anchor: Turn on the fan before heating the pan as part of your pre-cook ritual.
– If no hood exists: Open windows and use a portable fan directed outward during and after cooking, especially when boiling liquids or frying.
Gentle repair note:
For surface residue on cabinets: A solution of mild dish soap and warm water applied with a soft cloth is often sufficient. Avoid abrasive pads. If cabinetry shows signs of swelling or persistent stickiness, a carpentry professional can assess underlying causes.
Habit 3: Allowing Water to Pool Around Sink Rims
Why it matters:
The seam between sink and countertop relies on sealant integrity. Standing water:
– Accelerates sealant breakdown through constant moisture exposure
– May wick beneath countertop edges, affecting substrates over repeated cycles
– Creates conditions where microbial growth can take hold in hidden zones
Seasonal consideration:
In humid climates or during rainy seasons, drying this area becomes especially valuable. Thermal imaging studies indicate moisture accumulation at sink rims often precedes visible damage by many months—making prevention highly effective.
Adaptable solutions:
– Ideal (during renovation): Consider undermount sinks, which eliminate the vulnerable rim seam. For existing sinks, reseal annually after cleaning the area thoroughly.
– Budget-friendly: Keep a small “rim towel” folded beside the sink. Wipe the seam dry after washing dishes.
– Tool-assisted: A flexible silicone scraper efficiently removes pooled water from corners.
– Habit integration: Make rim-drying part of your final sink cleanup—just 10 seconds of attention.
Gentle repair note:
Check sealant monthly: Gently press along the seam. If it feels soft, gritty, or pulls away, clean the area with isopropyl alcohol and reapply 100% silicone caulk. Allow full cure time before water exposure. For substrate concerns (softness, discoloration), consult a qualified contractor.
Bathroom: Managing Moisture with Consistency
Bathrooms concentrate humidity and chemical exposure. Thoughtful routines here protect structural elements and indoor air quality.
Habit 4: Inconsistent Exhaust Fan Use After Showers
Why it matters:
Showers release significant water vapor. Without active removal:
– Condensation forms on cool surfaces (tiles, mirrors, windows), potentially migrating into wall cavities
– Sustained high humidity creates conditions where mold may develop on organic materials like drywall paper backing
– Repeated moisture cycles can stress wood framing or finishes over many years
Critical clarification:
Opening a window alone is not equivalent to mechanical ventilation. In humid climates, outdoor air may introduce more moisture. In cold climates, cold air contacting warm surfaces can cause immediate condensation. Exhaust fans actively expel moist air outside the living space. Verify your fan vents outdoors—not into an attic or crawlspace—by checking the exterior vent cap during operation.
Adaptable solutions:
– Ideal: Install a humidity-sensing fan that activates automatically and runs until moisture levels normalize.
– Budget-friendly: Use an inexpensive plug-in timer set for 20 minutes post-shower. Place a small hygrometer on the vanity to observe humidity dropping below 50%.
– Behavioral anchor: Link fan use to hanging your towel: “Towel up, fan on.”
– If no fan exists: Wipe down walls and glass with a squeegee or microfiber cloth after showering. Open windows and use a portable dehumidifier in the room for 30–60 minutes.
Gentle repair note:
Test fan effectiveness: Hold a lightweight tissue against the grille. If it adheres firmly during operation, airflow is likely adequate. Clean grille covers monthly. If you suspect improper venting (e.g., moisture in attic), consult an HVAC professional.
Habit 5: Using Incompatible Cleaners on Sensitive Surfaces
Why it matters:
Many common cleaners contain acids, alkalis, or abrasives that interact poorly with specific materials:
– Acidic cleaners (including some “natural” options like vinegar or lemon juice) can etch calcium-based stones like marble, travertine, or limestone
– Bleach may discolor or weaken cementitious grout over time
– Abrasive scrubs can scratch sealants or finishes, creating micro-grooves where soil accumulates
Material-first approach:
Always identify your surface type before selecting a cleaner. When uncertain:
1. Consult manufacturer guidelines
2. Choose pH-neutral, non-abrasive formulas
3. Test any new product in a hidden area first
Adaptable solutions:
– Ideal: Use cleaners specifically formulated for your surface type. Apply impregnating sealers annually to stone or grout (test first: water should bead on sealed surfaces).
– Budget-friendly: Clean with diluted castile soap and a soft microfiber cloth. Use a squeegee after every shower to minimize soap scum buildup.
– Prevention focus: Keep cleaning supplies stored under the sink for immediate access—reducing the temptation to use whatever is handy.
Gentle repair note:
For light surface concerns on stone: Specialty polishing powders designed for the specific stone type may help. For grout discoloration, oxygen-based cleaners are often gentler than chlorine bleach. When damage appears structural or widespread, a surface restoration professional can advise.
Habit 6: Leaving Damp Textiles on Surfaces
Why it matters:
Wet towels or bathmats create localized high-humidity zones:
– On wood vanities: Moisture may wick into grain, potentially causing swelling or finish issues over time
– On floors: Trapped moisture beneath mats (especially solid-backed types) slows drying cycles
– On grout: Constant dampness reduces opportunities for surfaces to fully dry between uses
Thoughtful detail:
Bathmats with solid rubber backing can inhibit airflow. Mats with ventilated backing or natural fibers like cotton allow better evaporation.
Adaptable solutions:
– Ideal: Install a heated towel bar (hardwired or plug-in) to accelerate drying. Choose bathmats with breathable backing.
– Budget-friendly: Hang towels on wall hooks positioned away from direct contact with walls. Place used bathmats over a shower rod or drying rack after use.
– Small-space hack: Over-the-door hooks maximize airflow in compact bathrooms. Keep a second dry mat available for immediate post-shower use.
Gentle repair note:
If surfaces feel persistently damp or show discoloration: Increase ventilation temporarily with a fan or dehumidifier. For surface mold on non-porous areas, hydrogen peroxide (3%) diluted with water may be effective—apply gently, wait briefly, then wipe. Never scrub aggressively. For concerns involving wood softness or wall integrity, seek professional assessment.
Living Areas & Bedrooms: Supporting Comfort and Longevity
Spaces designed for relaxation also benefit from subtle preservation awareness.
Habit 7: Blocking HVAC Vents with Furnishings
Why it matters:
HVAC systems rely on balanced airflow. Blocking vents may cause:
– Increased strain on system components, potentially affecting efficiency
– Pressure imbalances that could separate duct joints over many years
– Localized temperature differences near blocked vents, which in humid conditions might contribute to condensation on cooler wall surfaces
Thermal insight:
Infrared imaging reveals that surfaces behind blocked vents can register noticeably different temperatures than surrounding areas. In climates with high humidity, this thermal differential may create micro-condensation points over repeated cycles.
Adaptable solutions:
– Ideal: During furniture arrangement, note vent locations. Use low-profile furniture near floor vents. Install vent deflectors to redirect airflow upward if needed.
– Budget-friendly: Place self-adhesive felt pads under furniture legs to elevate pieces slightly above floor vents.
– Awareness practice: During seasonal HVAC maintenance, ask your technician to note vent locations on a simple home diagram for future reference.
Gentle repair note:
Periodically check walls near blocked vents on humid days. If surfaces feel cool or damp, investigate further. A moisture meter can provide objective readings (generally under 15% moisture content is acceptable for drywall). Address airflow obstructions promptly. For persistent moisture concerns behind walls, consult an HVAC or remediation specialist.
Habit 8: Overlooking Window Condensation in Cooler Months
Why it matters:
Condensation forms when warm, humid indoor air contacts cold glass. While wiping the glass helps, moisture may travel downward:
– Into window sills or frames, potentially affecting wood integrity over many seasons
– Along framing members, especially in older homes with less effective vapor barriers
– Contributing to elevated indoor humidity levels, which may affect comfort and air quality
Climate-aware context:
This is most relevant in regions with cold winters but can occur during unexpected cold snaps elsewhere. Single-pane windows are most susceptible, though even double-pane units may show condensation if indoor humidity is high. Coastal homes face compounded challenges with high outdoor humidity meeting cold glass.
Adaptable solutions:
– Ideal: Maintain indoor humidity between 30–40% during heating seasons using a whole-house or portable dehumidifier. Apply low-emissivity (Low-E) window film to raise interior glass temperature.
– Budget-friendly: Run kitchen and bathroom exhaust fans longer during cooking/showering. Place moisture absorbers on sills during peak condensation periods. Open curtains on sunny days to gently warm glass.
– Daily habit: Make condensation check part of your morning routine. If present, run a portable dehumidifier in that room for a short period.
Gentle repair note:
For minor surface concerns on wood sills: Light sanding followed by a wood-appropriate sealant may suffice. Never paint over soft or discolored wood—this traps moisture. If rot appears structural or extends beyond the sill, consult a window or carpentry professional. Prevention through humidity management is consistently more effective than repair.
Habit 9: Using Incompatible Products on Finished Floors
Why it matters:
Many aerosol polishes or dusting sprays contain silicones, waxes, or oils that:
– Create slippery residues, increasing fall risk
– Attract and bind dust and abrasive particles to the surface
– Potentially interfere with future refinishing efforts if contamination occurs
Manufacturer guidance:
Most hardwood floor manufacturers recommend against silicone-based products. Always refer to your floor’s care guidelines. When in doubt, simplicity wins: dry dusting followed by damp mopping with a manufacturer-approved cleaner.
Adaptable solutions:
– Ideal: Clean with a pH-neutral cleaner formulated for your floor type. Use microfiber mops that trap particles without chemicals.
– Budget-friendly: For finished wood floors (always verify first), a well-wrung mop with diluted mild soap solution is often sufficient. Vacuum weekly with a hard-surface attachment to remove abrasive grit.
– Mindset shift: “Shine” comes from a clean, intact finish—not added polish. If floors appear dull, professional recoating may be appropriate rather than masking with wax.
Gentle repair note:
Suspect residue buildup? Sprinkle a few drops of water on the floor. If beads form persistently (like on a waxed car), contamination may be present. Consult a flooring specialist before attempting removal. Prevention through product selection is far simpler than correction.
Laundry & Utility Areas: Attending to High-Stress Zones
These spaces endure vibration, moisture, and thermal demands—making small habits especially impactful.
Habit 10: Neglecting Dryer Vent Maintenance Beyond the Lint Trap
Why it matters:
The lint trap captures most—but not all—lint. Residue travels into ductwork where:
– Accumulation restricts airflow, causing the dryer to work harder and run hotter
– In vented systems, trapped lint retains moisture against metal ducts, potentially accelerating corrosion
– Blocked ducts represent a documented fire risk factor per fire safety organizations
Critical safety note:
Flexible foil or plastic ducts are more prone to lint snagging and are generally not recommended by safety standards. Rigid metal ducting is preferred. Never vent a dryer into a crawlspace, attic, or wall cavity—moisture and lint must exit the home entirely.
Adaptable solutions:
– Ideal: Schedule professional duct cleaning annually. Install rigid metal ducting during upgrades.
– Budget-friendly: Clean accessible duct sections quarterly using a long-handled brush kit. Vacuum the exterior vent opening regularly.
– Safety reinforcement: Test airflow seasonally: During a drying cycle, verify strong, warm air exiting the outdoor vent flap. Place a reminder sticker on the dryer: “Vent Check: [Season].”
Gentle repair note:
If airflow feels weak or drying times increase significantly, stop use and investigate. Replace flexible plastic/foil ducts with rigid metal immediately—they pose greater safety risks. When in doubt, consult an appliance or HVAC professional.
Habit 11: Consistently Overloading the Washing Machine
Why it matters:
Exceeding capacity guidelines may cause:
– Unbalanced drum rotation, increasing vibration and stress on suspension components
– Gradual loosening of hose connections from repeated vibration
– Inefficient cleaning, leaving detergent residue that may affect machine components or fabrics
Practical perspective:
Machines are engineered for specific load weights. Overloading—even moderately—amplifies mechanical stress with each cycle. Two properly sized loads often clean more effectively and gently than one overstuffed cycle.
Adaptable solutions:
– Ideal: Learn your machine’s true capacity (consult the manual). Use the “hand test”: After loading, you should slide a flat hand between clothes and the drum wall.
– Budget-friendly: Sort laundry by fabric weight. Heavy items (towels, jeans) occupy less volume than light items (t-shirts).
– Efficiency mindset: Frame two smaller loads as protecting your machine’s longevity—not wasting time.
Gentle repair note:
If unusual noises occur: Pause the cycle, redistribute clothing evenly, and restart. If noise persists, contact a technician. For front-loading machines prone to odor: Wipe the door gasket dry after each use. Run an empty maintenance cycle with an approved cleaner monthly. Prevention preserves both machine life and laundry quality.
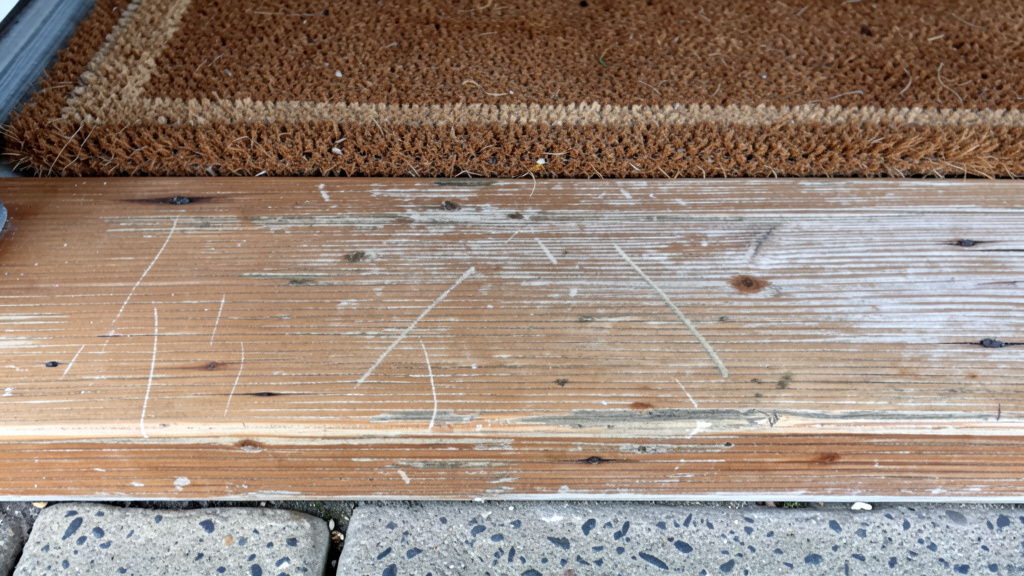
Entryways & Exterior Transitions: The First Line of Care
What crosses the threshold directly influences interior preservation.
Habit 12: Tracking Outdoor Elements Indoors on Footwear
Why it matters:
Shoes transport substances that interact with interior surfaces:
– Abrasive particles (sand, grit) gradually scratch floor finishes with repeated foot traffic
– Road salts (in applicable regions) are hygroscopic—they attract moisture, potentially affecting finishes or metal thresholds
– Soil carries organic matter that may introduce microbes or stains
Material-specific impact:
– Hard surfaces: Grit acts like fine sandpaper on finishes over time
– Grout: Salt crystallization may contribute to surface spalling in vulnerable formulations
– Carpet: Embedded soil abrades fibers with every step; vacuuming alone cannot remove deeply lodged particles
– Thresholds: Moisture combined with debris may affect operation or corrosion resistance
Adaptable solutions:
– Ideal (if renovating): Design a dedicated transition zone: outdoor scraper mat → indoor absorbent mat → shoe storage. Place mats on both sides of the door.
– Budget-friendly: Use two mats: a coarse “scraper” mat outside, a highly absorbent mat inside. Add a simple tray or bench near the door for shoe removal.
– Cultural practice: Establish a household “shoes-off” norm. Keep comfortable indoor slippers or clean shoes by the door. For guests, a polite, consistent message (“We keep shoes off indoors to protect our floors—slippers are here if you’d like!”) is widely understood.
Gentle repair note:
For salt residue on hard surfaces: A mild solution of water and pH-neutral cleaner, applied gently, may help. Always test first. For scratched wood floors, color-matched repair pens offer cosmetic improvement. Severely damaged threshold strips are often inexpensive to replace—addressing them promptly prevents moisture intrusion. Prevention through mats and transition habits remains the most effective strategy.
Interconnected Systems: Seeing the Whole Picture
Habits rarely operate in isolation. They form patterns that either support or strain your home’s systems:
– The humidity pathway: Inconsistent bathroom ventilation elevates whole-house humidity → increases likelihood of window condensation → slows drying near blocked vents → places additional demand on HVAC systems.
– The moisture pathway: Tracking wet shoes indoors deposits moisture → combined with poor airflow near entryways, drying slows → creates conditions where microbial growth may find footholds.
– The chemical pathway: Using incompatible cleaners degrades surface sealants → makes materials more porous → increases cleaning frequency → accelerates wear.
Recognizing these connections transforms preservation from fragmented tasks into holistic stewardship. Fixing one high-leverage habit (like consistent bathroom ventilation) often eases pressure across multiple systems. This is the power of the Awareness pillar: seeing your home as an integrated environment reveals where small efforts create ripple effects of protection.
Working With Human Nature: Sustainable Habit Integration
Change thrives when it aligns with real life. Address common friction points with compassion:
“I don’t have extra time”
Solution: Embed micro-actions into existing routines.
– While coffee brews: Wipe the kitchen sink rim dry.
– While brushing teeth: Activate the bathroom fan timer.
– While removing outdoor shoes: Shake mats gently on the porch.
These take seconds but prevent hours of future effort. Frame them as “time invested,” not “tasks added.”
“Supplies are hard to reach”
Solution: Practice strategic placement.
– Store microfiber cloths in kitchen drawers.
– Keep a small grout brush under the bathroom sink.
– Position the shoe tray immediately inside the entry door.
Make protective actions require zero extra steps. Place less-compatible products (like harsh cleaners) in less accessible locations.
“I keep forgetting”
Solution: Use gentle environmental cues.
– A small symbol (💧) beside the bathroom switch.
– A brightly colored sponge caddy in the sink.
– A recurring calendar reminder: “Sunday: Quick Moisture Scan.”
Pair new habits with established ones (“habit stacking”): After I hang my towel, I check the window for condensation.
“Changing everything feels overwhelming”
Solution: Embrace the “One Habit Per Season” approach.
– This season: Focus solely on consistent bathroom fan use.
– Next season: Add entryway mat maintenance.
– Following season: Address sink rim drying.
Small, consistent progress builds lasting change. Reducing a high-impact habit by even 50% meaningfully decreases cumulative stress. Celebrate micro-wins—they compound.
Adaptive Strategy Reference
| Habit Focus | Ideal Approach | Budget-Conscious Option | Space-Limited Adaptation |
|---|---|---|---|
| Countertop moisture | Dedicated sink caddy + vertical board storage | Ceramic tile coaster + folded microfiber cloth | Integrate drying into post-dish routine |
| Vent obstruction | Vent deflectors + furniture planning | Felt pads under furniture legs | Monthly visual vent check |
| Dryer safety | Annual professional duct cleaning | Quarterly DIY accessible duct cleaning | Seasonal airflow test + reminder sticker |
| Entryway protection | Multi-mat transition zone + shoe storage | Two-mat system (outdoor scraper + indoor absorbent) | “Shoes-off” norm + compact tray |
Remember: Preservation is stewardship, not austerity. A well-placed $10 mat significantly reduces abrasive wear. Ten seconds of mindful wiping supports surface longevity. These choices reflect care—for your home, your resources, and your peace of mind.
Your Questions, Answered
Q: How soon might damage become visible from these habits?
A: Visible changes typically emerge gradually. Moisture-related patterns (like mold or warping) may appear within a year or two in consistently humid environments. Abrasive wear on floors often becomes noticeable over several years. System stress (like HVAC strain) may manifest as reduced efficiency or component wear over multiple years. The greatest value lies in prevention—addressing habits before visible signs appear.
Q: Are certain homes more vulnerable to these patterns?
A: Yes. Key factors include:
– Climate: Humid regions accelerate moisture-related concerns; areas with freeze-thaw cycles require extra attention to condensation.
– Home age: Older homes may have less effective vapor barriers or aging materials requiring gentler care.
– Construction details: Properly sealed windows, adequate attic ventilation, and correct duct routing significantly influence resilience.
– Materials: Natural stone, solid wood, and unsealed grout benefit from more attentive routines than engineered alternatives.
Focus your efforts where your home’s specific context creates higher sensitivity.
Q: Which habit offers the highest immediate impact to address?
A: Prioritize based on your home’s current signals:
– Musty odors or visible moisture? → Focus on bathroom ventilation consistency.
– Uneven room temperatures or high energy use? → Check vent obstructions.
– Window condensation in cooler months? → Address indoor humidity levels.
– No current symptoms? → Dryer vent safety checks offer strong preventative value. Start where you feel most motivated—momentum builds from action.
Q: Can “natural” cleaners still cause damage?
A: Absolutely. “Natural” does not equal “universally safe.” Vinegar and lemon juice are acidic and may etch stone. Baking soda is mildly abrasive and can scratch soft finishes. Even salt-based scrubs affect surfaces. Always:
1. Identify your surface material
2. Verify cleaner compatibility (pH-neutral is often safest)
3. Test in a hidden area first
When uncertain, mild soap and water with a soft cloth is a reliable baseline for most sealed surfaces.
Q: How can I check for existing damage from these habits?
A: Conduct a gentle, targeted inspection:
– Under sinks: Shine a light along cabinet bottoms; look for softness, discoloration, or swelling.
– Window frames: Press drywall near frames gently; sponginess warrants attention.
– Near vents: Note discoloration or persistent musty smells.
– Floors: Observe for cupping (edges raised) in hardwood—often a moisture indicator.
If concerns arise, a qualified home inspector can provide objective assessment. Early awareness prevents escalation.
Q: Do these principles apply to rental properties?
A: Yes—with shared responsibility. Tenants can:
– Report leaks or moisture concerns promptly
– Use exhaust fans consistently
– Avoid cleaners that may damage surfaces
Landlords should:
– Ensure ventilation systems function correctly
– Maintain HVAC and dryer vents
– Install durable, appropriate materials
Clear communication benefits everyone. Tenants: Document pre-existing conditions. Landlords: Include simple care guidelines in welcome packets. Mutual respect preserves the property.
Q: What indoor humidity levels support home health?
A: General seasonal guidelines:
– Cooler months (heating): 30–40% relative humidity helps prevent window condensation
– Warmer months (cooling): 40–50% supports comfort while inhibiting microbial growth
– Avoid sustained levels above: 60% relative humidity
Use an affordable hygrometer to monitor. In persistently humid climates, dehumidification is as valuable as cooling. In very dry climates, slight humidification may protect wood—but balance is key. Your home’s specific construction and climate zone may adjust these ranges; local building professionals can offer tailored advice.
Q: Do air purifiers address moisture-related concerns?
A: Not directly. Air purifiers capture airborne particles (dust, pollen, some mold spores) but do not remove water vapor from the air. For humidity management, you need:
– Dehumidifiers: Actively extract moisture
– Exhaust fans: Expel moist air outdoors
– Properly sized HVAC: Dehumidifies as it cools
Purifiers complement these by improving air quality but do not resolve the moisture source enabling mold growth. Address the root cause first.
Q: How often should stone or grout be resealed?
A: Test annually—don’t rely on calendars:
– Stone: Sprinkle water on the surface. If it beads up, sealer is likely intact. If it darkens the stone within minutes, resealing may be beneficial.
– Grout: Water should remain on the surface. If absorbed quickly, resealing is advisable.
Frequency varies by use: High-traffic kitchen areas may need attention more often than low-traffic bathrooms. Impregnating sealers (which penetrate pores) are generally preferred over topical coatings for durability. Always follow product instructions and test first.
Q: When is DIY repair appropriate versus calling a professional?
A: General guidance:
– Often suitable for DIY: Light surface scratches (repair pens), re-caulking visible seams, cleaning surface residue with appropriate solutions
– Consult a professional for: Structural softness, hidden moisture, electrical concerns, widespread discoloration, or anything involving framing, insulation, or major systems
When uncertain, a brief consultation with a qualified tradesperson provides clarity. Misdiagnosis can escalate costs. Many inspectors offer affordable hourly assessments for specific concerns—view it as preventative investment.
Q: How do pets influence these preservation habits?
A: Pets introduce unique considerations:
– Water bowls: Use trays to catch spills; refresh water daily to minimize mineral deposits
– Nail care: Keep nails trimmed to reduce floor scratching; place area rugs in high-traffic paths
– Accidents: Clean immediately with enzyme-based cleaners (avoid ammonia-based products, which may encourage repeat marking)
– Shedding: Vacuum hard surfaces 2–3 times weekly to remove abrasive pet hair
Integrate pet care into your routine: “After feeding, check for spills.” Work with your pet’s habits rather than against them.
Q: What’s the most impactful low-cost preservation step?
A: Three highly accessible actions:
1. Entryway mats: A quality scraper mat outside and absorbent mat inside captures the majority of tracked-in abrasives.
2. Bathroom fan consistency: Using the fan during and after showers manages moisture at its source.
3. Dryer vent awareness: Verifying strong airflow from the outdoor vent and scheduling periodic cleaning addresses a critical safety and efficiency factor.
These require minimal investment but protect against some of the most common and costly wear patterns.
Conclusion: Cultivating a Relationship of Care
Your home does not demand perfection. It responds to consistent, mindful attention—the quiet accumulation of small choices made with awareness. Wiping a sink rim dry, running a fan after a shower, removing shoes at the door—these are not chores. They are gestures of respect toward the space that shelters your life. They reflect an understanding that preservation is woven into daily living, not separate from it.
Carry forward these three anchors:
1. Awareness turns invisible processes into visible choices.
2. Adaptation designs your environment to support sustainable habits.
3. Assessment offers gentle feedback without judgment.
This is stewardship as connection—a recognition that how we inhabit our spaces shapes their ability to nurture us for years to come.
Your 24-Hour Invitation
Within the next day, choose one micro-action that feels achievable:
– Place a small reminder note beside your bathroom light switch: “Fan on?”
– Position a ceramic tile or folded cloth beside the kitchen sink for wet items.
– Set a single absorbent mat just inside your main entry door.
This single step breaks inertia. Momentum grows from action, not intention. Be kind to yourself in the process.
The Deeper Perspective
Homes hold memory, safety, and belonging. By aligning daily routines with material needs and systemic awareness, we honor that role. We reduce waste through thoughtful maintenance. We enhance safety through proactive care. We protect value through informed choices. Yet beyond practicality lies something quieter: the dignity of tending. In a culture of disposability, choosing care is a meaningful act. It whispers to the future: This place was honored. It was tended with intention. It endured.
Start where you are. Use what you have. Do what you can. Watch how these small threads of attention weave into a resilient, enduring home—and a deeper sense of partnership with the space you call your own.
Continue Your Preservation Journey:
The Humidity Handbook: Balancing Indoor Moisture for Health and Home Longevity | Seasonal Home Maintenance Checklists: A Month-by-Month Guide | Understanding Home Materials: What Your Walls, Floors, and Roofs Are Made Of (And How to Care for Them) | Emergency Home Repairs: Calm, Confident Responses to Common Issues | The Mindful Homeowner: Cultivating Awareness in Everyday Spaces | DIY Home Inspection Basics: Spotting Early Signs of Wear | Sustainable Home Care: Eco-Conscious Products and Practices That Protect Your Investment