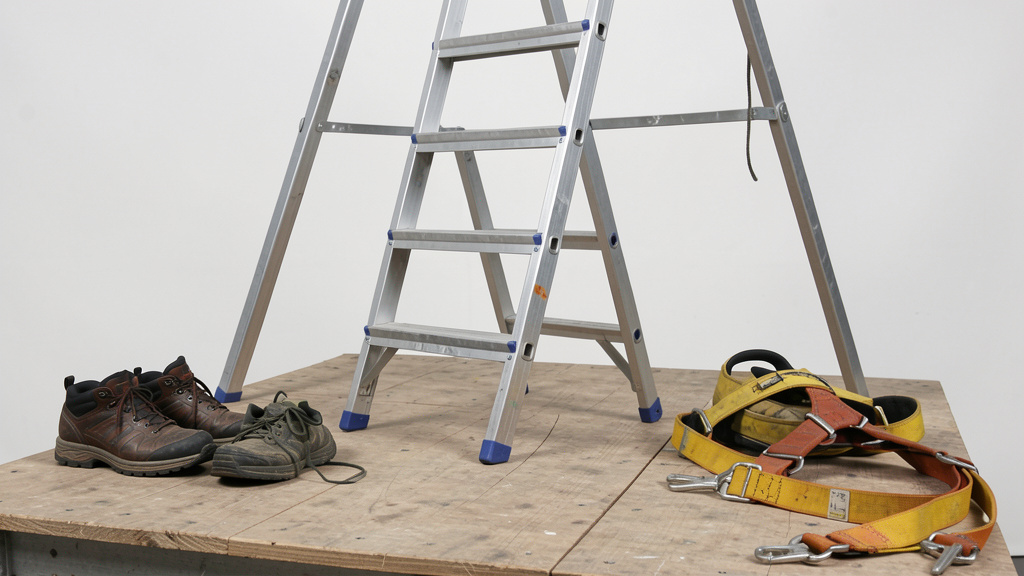
Your definitive, step-by-step system for transforming ladder use from a routine risk into a controlled, confident practice—grounded in engineering principles, safety standards, and adaptable real-world protocols
Hundreds of thousands of ladder-related injuries are treated in emergency settings annually across North America, with home projects representing a significant portion of these incidents. Many stem not from recklessness, but from subtle oversights: a slightly uneven setup, unnoticed wear on critical components, or the natural human tendency to overreach “just this once.” This guide reframes ladder safety not as a list of restrictions, but as an empowering, systematic practice. We’ll walk through every phase—from selection to storage—with actionable techniques, contextual adaptations, and contingency planning that turns abstract warnings into reliable habits. Whether you’re hanging seasonal decorations, refreshing a room’s paint, or maintaining gutters, this framework ensures height becomes a manageable variable, not a hazard.
Introduction: Why “Common Sense” Isn’t Enough
Ladders appear deceptively simple. Their straightforward design fosters a dangerous assumption: If I’ve used one before without incident, I know what I’m doing. Yet biomechanical understanding reveals why this intuition fails. When standing on a ladder, your center of gravity shifts dynamically with every movement. Even a modest overreach beyond the ladder’s side rails can generate destabilizing forces—especially on surfaces with reduced traction like smooth flooring, damp grass, or loose gravel. Safety standards developed by organizations like the American National Standards Institute (ANSI A14 series) and insights from occupational safety bodies reflect decades of incident analysis, material science, and human factors research. These aren’t arbitrary rules; they’re codified lessons from preventable events. This guide synthesizes those evidence-informed protocols into a fluid, memorable system tailored for the home environment—where professional oversight is absent, but consequences remain significant. Understanding the why behind each step transforms compliance from chore to conscious competence.
The 7-Step Ladder Safety Framework: Building Confidence from Ground to Height
Safety isn’t a single action performed moments before climbing. It’s a continuous chain of decisions beginning long before you unbox the ladder and extending after you store it away. Break one link, and the entire system weakens. This framework structures those decisions into seven interconnected phases. Mastering them creates what safety professionals describe as “defense in depth”—multiple overlapping safeguards ensuring that if one element is overlooked, others remain intact. Keep this sequence visible in your workspace. Let it become as automatic as checking your mirrors before driving.
Step 1: Selecting the Right Ladder for the Task
Choosing incorrectly here undermines every subsequent safety step. A ladder too short invites dangerous overreaching; insufficient duty rating risks structural compromise; the wrong material near electrical sources introduces serious hazards. Selection requires answering four precise questions:
Question 1: What is the actual working height required?
Never confuse wall height with needed ladder height. For extension ladders leaning against a structure, the ladder should extend at least 3 feet (0.9 meters) above the landing point to provide a secure handhold when stepping on or off. Example: To safely access a gutter line approximately 10 feet high, you need a ladder reaching at least 13 feet at the contact point. But ladder lengths are marketed by closed length (for extensions) or maximum height (for step ladders). An extension ladder sold as “24 feet” typically provides only 21–22 feet of usable reach when angled correctly. Consult the manufacturer’s reach chart—never estimate. For step ladders, your work height should never exceed the second-highest step. Standing on the top cap or pail shelf shifts your center of gravity dangerously high and violates safety certifications.
Question 2: What is the total weight load?
Duty rating encompasses more than body weight. Include:
– Your weight (including clothing and footwear)
– Tools (hammer, drill, tool belt)
– Materials (paint can, bundles of supplies)
ANSI defines duty ratings. For home DIY, focus on these common categories:
– Type IA (Industrial): 300 lbs (136 kg) total working load. Ideal for most homeowners handling tools and materials.
– Type I (Heavy Duty): 250 lbs (113 kg). Suitable for lighter tasks like changing light fixtures.
– Type II (Medium Duty): 225 lbs (102 kg). Only for very light, infrequent tasks (e.g., reaching a high shelf).
Critical nuance: A “300-lb rating” refers to the total safe working load. A person weighing 220 lbs carrying a 15-lb tool belt and 10-lb paint can exceeds a Type I capacity. When uncertain, select a higher duty rating. Material matters too: fiberglass models often support higher load capacities than comparable aluminum designs due to structural density.
Question 3: What is the work environment?
– Electrical considerations (overhead lines, outdoor outlets): Fiberglass is non-conductive. Never use aluminum near electrical sources—even if lines appear insulated. Voltage can arc across gaps. Wood is non-conductive when dry but becomes unreliable when damp or soiled.
– Indoor smooth surfaces (tile, hardwood): Prioritize ladders with slip-resistant feet. Consider adding rubber matting beneath feet. Aluminum’s lighter weight may increase sliding risk versus heavier fiberglass on slick surfaces.
– Outdoor uneven terrain: Look for models with adjustable leveling feet or wide-flared bases. Multi-position ladders often include terrain-adapting features.
– Confined spaces: A compact articulated ladder folds into step, extension, or scaffold configurations, reducing the need to force an oversized ladder into tight areas.
Question 4: What task duration and posture are required?
– Brief tasks (<15 mins), minimal tool use: Standard step ladder suffices.
– Extended work (painting walls, siding repair): A platform ladder with a built-in shelf reduces fatigue and provides stable tool placement.
– Frequent repositioning: Wheeled base extension ladders save physical strain but require extra setup vigilance.
– Overhead work (ceiling painting): Ensure the ladder allows arms to work comfortably below shoulder height. Working above shoulder level fatigues muscles rapidly, increasing instability risk.
Common Selection Mistakes to Avoid:
– Using a step ladder in the folded “A-frame” position as a straight ladder (structurally unstable; violates ANSI A14.2)
– Substituting chairs, buckets, or tables for ladders (no engineered stability; zero duty rating)
– Assuming “taller is better”—an excessively tall ladder is harder to control during setup and creates unnecessary height exposure
– Ignoring storage constraints: A ladder too large for your space often gets stored improperly (leaning against walls unsupported), accelerating wear
Step 2: Pre-Use Inspection Protocol
A correctly selected ladder can still be compromised by undetected damage. Perform this brief inspection every single time, even if stored indoors and used recently. Treat it like a pilot’s pre-flight checklist—non-negotiable.
Visual Scan (Approx. 30 seconds):
– Rungs and rails: Hold ladder horizontally at eye level. Look for cracks (especially at weld points on metal ladders), splinters (wood), deep gouges, or corrosion. Run gloved fingers along rails—catches indicate stress points.
– Feet: Check rubber pads for tears, hardening, or separation from the base. Worn feet significantly reduce grip on smooth surfaces.
– Hardware: For extension ladders, verify rope isn’t frayed and pulleys move freely. For step ladders, ensure spreaders lock firmly with an audible click. Test locks by applying gentle downward pressure on the spreader bar.
– Labels: Confirm duty rating and warning labels are legible. Faded labels often indicate prolonged exposure to elements.
Functional Test (Approx. 60 seconds):
1. Place ladder on firm, level ground.
2. For step ladders: Open fully. Stand back. Shake gently at the top. Excessive wobble indicates loose joints or bent rails.
3. For extension ladders: Extend to working height. Lock both sides securely. Apply moderate pressure sideways at the top. Any noticeable “give” suggests worn locks or rail damage.
4. Test all moving parts: hinges, locks, wheels. Hesitation or grinding noises signal wear.
When to Retire a Ladder Immediately:
– Any visible crack in rails or rungs
– Bent or twisted rails
– Missing or broken spreader bars on step ladders
– Significant rope fraying on extension ladders
– Evidence of chemical exposure (e.g., solvent contact on fiberglass)
Do not attempt repairs. Welding, epoxy, or tape creates false confidence. Contact the manufacturer—many offer recycling programs. Document retirement to reinforce safety awareness.
Step 3: Safe Setup and Positioning
Setup errors contribute significantly to ladder incidents. This phase demands precision, not haste. Rushing here sacrifices minutes now to risk serious consequences later.
The Critical Angle for Extension Ladders: The 4-to-1 Rule
Leaning too steep invites backward tipping; too shallow causes base sliding. The established ratio: For every 4 feet of height where the ladder contacts the wall, the base should sit 1 foot away from the wall.
Practical application:
– Stand with toes against ladder feet.
– Extend arms straight forward, palms flat against the rails.
– Your hands should rest comfortably at shoulder height.
No measuring tape? Use the “belt buckle test”: When standing on the bottom rung, your belt buckle should align vertically with the ladder’s side rails.
Verification: Place a level on a rung. The bubble should center precisely. On uneven ground, use purpose-built ladder levelers (wedge-shaped blocks that attach to feet) or solid lumber shims—never loose bricks, rocks, or stacked boards. Shims must extend fully under the foot and be secured to prevent shifting.
Step Ladder Setup Essentials
– Fully open until spreaders lock audibly. Never force spreaders; if stiff, inspect for debris or damage.
– Place on solid, level surface. On soft soil, use plywood pads (24″x24″ minimum) under feet to prevent sinking.
– Ensure all four feet contact the ground simultaneously. Lift one side slightly; if it drops with a thud, the surface is uneven. Re-level.
– Position so your work area is centered between the rails. Avoid setting up where you’ll need to lean sideways beyond a comfortable reach.
Surface-Specific Setup Adjustments
| Surface Type | Primary Risk | Mitigation Strategy |
|————–|—————|———————|
| Smooth Indoor (Tile, Vinyl) | Base sliding | Place non-slip mat (rubber shelf liner) under feet; have helper brace base during initial climb |
| Grass/Dirt | Feet sink; uneven settling | Use wide plywood pads; check stability after first minute of use |
| Gravel | Feet shift; unstable contact | Sweep clear area; place plywood sheets under feet |
| Sloped Roof | Ladder slides downward | Use roof hooks rated for your ladder; secure top with rope to anchored point above work area |
| Near Doorways | Unexpected opening causes collision | Lock door; post visible warning sign; use doorstop to prevent swing |
Securing the Ladder
– Top contact point: Rest against solid structural element (stud, rafter), not gutter, window frame, or fragile siding. Pad contact point with rubber hose slit lengthwise to prevent slipping and surface damage.
– Base security: On hard surfaces, use ladder mitts (rubber sleeves that grip rails near base) or anchor straps. For work above typical heights, having a dedicated spotter brace the base area—not hold the ladder while you climb—adds stability.
– Wind considerations: Moderate winds warrant postponement. Ladders act as sails; even gentle gusts exert noticeable lateral force.
Why This Precision Matters: Physics is unforgiving. Small deviations from the optimal angle significantly increase sliding risk. These margins are why consistent measurement matters—they reflect lessons learned from real-world incidents.
Step 4: The Correct Climbing Technique
How you ascend sets the tone for the entire task. Rushed, unbalanced climbing fatigues muscles prematurely and establishes poor posture habits.
The Three-Point Contact Rule: Non-Negotiable
Always maintain three points of contact with the ladder: two hands and one foot, or two feet and one hand. This distributes weight and provides immediate stability correction if balance shifts.
– Ascending: Face the ladder. Grip rails (not rungs) firmly. Move one foot up, then the opposite hand, then the other foot, then the remaining hand. Keep body centered between rails.
– Descending: Reverse the sequence deliberately. Never jump down. Never descend facing away—this shifts center of gravity backward.
Body Mechanics for Stability
– Hips aligned with ladder plane: Imagine a vertical line running through your hips. It should stay centered between the rails. Leaning hips outside this plane creates destabilizing torque.
– Knees slightly bent: Absorbs micro-movements and maintains balance reflexes. Locking knees reduces stability.
– Tools carried correctly: Use a tool belt. For larger items, hoist after reaching position using a rope bag. Never carry tools in hands while climbing.
– Foot placement: Place entire foot flat on rung, heel to toe. Avoid “toe-only” contact—it reduces balance control. Wear closed-toe shoes with defined heels and slip-resistant soles (avoid smooth leather or worn soles).
Common Climbing Errors:
– “Walking” the ladder sideways while standing on it: This twists rails and risks tipping. Descend, reposition base, re-climb.
– Climbing too high: On extension ladders, never stand above the fourth rung from the top. On step ladders, never stand above the second step from the top.
– Rushing: Climbing speed correlates with error rate. Pause at the halfway point to re-check stability before proceeding.
Step 5: Working Safely at Height
This is where complacency often peaks. The climb is complete; focus shifts entirely to the task. This is precisely when vigilance must intensify.
The Overreach Zone: Your Invisible Boundary
Define your safe work envelope before starting:
– Arms should remain within the ladder’s side rails.
– Hips must stay between the rails at all times.
– If you need to stretch beyond this zone, descend and reposition.
Visual cue: Attach bright tape to rails at shoulder height. If your hands pass the tape laterally, you’re overreaching.
Real-world example: Painting a wall beside a window. Instead of leaning left to reach the window frame while standing centered, descend, move ladder 2 feet left, re-climb. This adds minimal time but eliminates fall risk.
Tool and Material Management
– Tool belts: Keep frequently used items within easy reach. Position heavier tools toward your body’s centerline to avoid torque.
– Material staging: For paint cans, use a ladder with a built-in shelf or attach a magnetic parts tray to rails. Never balance containers on rungs.
– Debris control: Keep a small bucket clipped to your belt for trash. Falling objects pose hazards to people or property below.
– Electrical tools: Use GFCI-protected outlets. Coil excess cord loosely and secure to rails with hook-and-loop straps—never let cords dangle where they can snag.
Physiological Awareness
– Fatigue signals: Shaking arms, blurred vision, or sudden sweating indicate muscle fatigue. Descend immediately. Work in focused intervals (e.g., 15–20 minutes) with ground breaks.
– Hydration: Dehydration impairs balance and judgment. Keep water accessible on the ground; drink during breaks.
– Distractions: Silence phone notifications. Inform household members not to call up unexpectedly. A sudden shout can trigger a startle reflex causing loss of balance.
– Changing conditions: Monitor surroundings. A sudden breeze, light moisture (makes rungs slippery), or shifting sun (causing glare) warrants immediate descent.
Working with a Partner
– Spotter role: Stands clear of the base area, watches for instability, hands up tools only when requested, and monitors surroundings (children, pets, vehicles).
– Communication protocol: Use clear phrases: “Passing up hammer,” “Descending now,” “Hold position.” Avoid ambiguous terms.
– Capacity limits: Two people on one ladder—even a wide platform model—exceeds design limits unless explicitly rated for dual use (rare in consumer models).
Step 6: Descending with Control
Fatigue makes descent riskier than ascent. Muscles are tired; attention is diverted to task completion. Treat descent with equal ritual.
The Deliberate Descent Sequence
1. Complete final task movement. Secure tools.
2. Face the ladder. Re-establish three-point contact.
3. Pause for 5 seconds. Scan base area for new hazards (pets, dropped tools, shifted debris).
4. Descend one rung at a time using the same hand-foot pattern as ascent.
5. Maintain visual contact with rungs until feet are firmly on ground.
6. Step away only after confirming stability.
Critical Descent Triggers for Immediate Action
– Ladder shifts: Freeze. Assess. If minor shift, carefully descend. If significant movement, call for help—do not attempt to “correct” while aloft.
– Sudden dizziness/nausea: Grip rails firmly. Breathe deeply. Call for assistance. Do not rush down.
– Condition deterioration: Descend methodically. Panic increases fall risk more than the hazard itself.
Why Descending Matters: Research indicates that controlled descent requires sustained neuromuscular engagement. Rushing descent is a documented factor in incidents, particularly during longer tasks or in varying environmental conditions.
Step 7: Post-Use Care and Storage
How you conclude determines readiness for next use—and prevents degradation that causes future failures.
Cleaning Protocol
– Wipe rails and rungs with a damp cloth to remove dirt, grease, or residues (certain chemicals can degrade materials over time).
– Clean feet thoroughly: Embedded grit reduces grip. Use a stiff brush on rubber pads.
– Dry completely before storage, especially metal components. Moisture trapped in joints accelerates corrosion.
– Inspect again: Post-use is an ideal time to spot new wear (a hairline crack from stress, a loosened component). Note findings for future reference.
Storage Best Practices
– Indoors preferred: Protects from UV exposure (fiberglass can become brittle), moisture (rust), and temperature extremes (wood warping).
– Horizontal support: Store on racks with supports every 4–6 feet. Never lean vertically against a wall unsupported—this bends rails over time.
– Clear of traffic: Prevents accidental knocks. Hang a reminder tag if stored in a shared workspace.
– Separate from chemicals: Store away from gasoline, solvents, or fertilizers whose fumes can degrade materials.
– Step ladders: Store fully closed to prevent spreader mechanism strain.
Seasonal Maintenance Checklist (Perform Quarterly)
– [ ] Tighten all bolts and hinges per manufacturer guidance
– [ ] Lubricate moving parts with silicone spray (avoid oil—it attracts dust)
– [ ] Re-check rope integrity on extension ladders
– [ ] Verify non-slip pads are intact and clean
– [ ] Review duty rating labels for legibility
The Fundamental Principle: Ladder safety is a closed-loop system. The care you invest in storage directly determines the reliability you depend on during setup. There are no isolated steps—only interconnected responsibilities.
Navigating Ladder Types: Safety Considerations for Every Design
Not all ladders share identical protocols. Understanding type-specific nuances prevents dangerous assumptions.
Extension Ladders
– Critical Risk: Base sliding during use. Mitigation: Strict 4:1 angle adherence + base securing.
– Locking Mechanism: Always engage both locks before climbing. Test by pulling up sharply on the fly section.
– Section Separation: Never separate sections for use as shorter ladders unless explicitly designed for it. Separated sections lack structural integrity.
– Transport Tip: When carrying horizontally, grip near the balance point (usually 1/3 from bottom). Warn others—”Ladder coming through!”—to avoid collisions.
Step Ladders
– Top Cap Misuse: Never stand on the top cap or pail shelf. These are for tool placement only. The highest safe standing level is the second step from the top.
– Spreaders: If spreaders feel loose, stop use. Bent spreaders indicate rail damage.
– Folding Hazard: When closing, keep fingers clear of hinge points. Use the pull cord if equipped.
– Stability Tip: On very smooth floors, place non-slip tape on the bottom section of rails where feet contact ground.
Platform Ladders
– Advantage: Built-in standing platform reduces fatigue for extended tasks.
– Caution: Platform adds height—recalculate working reach. Ensure platform locks engage fully with audible click.
– Weight Distribution: Stand centered on platform. Avoid leaning heavily on handrails.
Multi-Position/Articulating Ladders
– Configuration Verification: Before each use, confirm all hinge locks are fully engaged for the selected mode (step, extension, scaffold). A partially locked hinge can collapse under load.
– Mode-Specific Rules: When used as a scaffold (two A-frames with plank), never exceed plank’s rated capacity. Ensure plank rests fully on hooks with no overhang.
– Complexity Risk: More moving parts = more inspection points. Spend extra time on hinge and lock checks.
Telescoping Ladders
– Section Locks: Verify every extended section is locked. A single unlocked section can collapse inward.
– Retraction Hazard: Keep hands clear of rail channels when collapsing. Use slow, controlled motion.
– Storage Advantage: Compact size encourages proper indoor storage—leverage this.
Special Scenarios: Adapting Safety Protocols to Challenging Conditions
Real-world projects rarely occur in ideal conditions. These protocols address high-risk variables with adaptable solutions.
Working on Uneven or Soft Ground
– Problem: Feet sink or shift during use.
– Solution: Use 24″x24″ plywood pads under all feet. For noticeable slopes, use adjustable leveling feet kits designed for your ladder model. Never use makeshift shims that can dislodge. Re-check stability after the first minute of work.
– Pro Tip: Carry a small level. Place on a lower rung to verify levelness after setup.
Electrical Hazard Environments
– Overhead Power Lines: Maintain generous clearance. Assume all lines are energized.
– Material Choice: Fiberglass is essential within proximity of any electrical source. Aluminum conducts electricity even without direct contact.
– Tool Selection: Use tools with non-conductive handles. Avoid metal tape measures near lines.
– Emergency Protocol: If ladder contacts a line, do not touch the ladder or person. Shuffle away with feet together (don’t stride). Call emergency services immediately. Instruct anyone on the ladder to jump clear without touching ladder and ground simultaneously.
Adverse Weather Conditions
– Wind: Cease work in moderate winds. Gusts are unpredictable. Secure ladder horizontally on ground if caught mid-task.
– Rain/Moisture: Wet surfaces significantly reduce grip. Postpone if possible. If unavoidable, use rung covers with aggressive tread pattern. Wear gloves with enhanced grip.
– Temperature Extremes: Metal ladders become too hot to handle safely in direct sun. Fiberglass may become less flexible in freezing temperatures—handle gently. Work during milder parts of the day when feasible.
– Low Light: Avoid ladder use at dusk/dawn without adequate lighting. Shadows hide surface irregularities. Use a headlamp with a focused beam.
Working Near Openings or Edges
– Stairwells, balconies: Position ladder so descent path is clear. Use barrier tape below to warn others.
– Roof Access: Use ladder stabilizers (wide bars that distribute weight) plus roof hooks. Never rest ladder directly on gutter—it can detach under load.
– Window Washing: Use ladder with standoff brackets to keep rails clear of glass. Work from inside whenever possible.
Physical Considerations and Ergonomic Adjustments
– Reduced Mobility: Consider motorized lift platforms for recurring tasks. For occasional use, choose ladders with wide, deep steps (≥3″ depth) and handrails.
– Vertigo/Dizziness: Practice climbing to low heights first. Focus on a fixed point ahead, not downward. Use a spotter for reassurance.
– Strength Concerns: Opt for lighter fiberglass models. Use wheeled bases for transport. Break tasks into shorter sessions.
– Always prioritize: If a task feels physically unsafe, it is. Professional assistance is a sign of responsibility, not limitation.
Emergency Response: Preparedness Minimizes Harm
Despite precautions, incidents can occur. Calm, informed response makes a critical difference. This protocol aligns with widely recognized emergency guidelines.
If You Fall:
1. During fall: Tuck chin to chest, bend knees, try to roll on impact—do not extend arms to break fall (high fracture risk).
2. After landing: Stay still. Assess for pain, numbness, or inability to move. Do not “walk it off.”
3. If alone: Use phone voice commands to call for help. If unable to speak, trigger emergency alert on wearable device.
4. If others present: Clearly state: “I’ve fallen. Do not move me. Call emergency services.”
If Witnessing a Fall:
1. Ensure scene safety: Secure area. Turn off power if electrical hazard exists.
2. Call emergency services immediately. Provide exact location, number of people involved, visible injuries.
3. Do NOT move victim unless immediate danger exists (fire, traffic). Spinal injuries can be worsened by movement.
4. Comfort and monitor: Speak calmly. Check breathing. Control bleeding with direct pressure using clean cloth. Do not remove impaled objects.
5. Preserve context: Note ladder position, surface conditions, weather. Take photos if safe to do so—valuable for future prevention.
Post-Incident Protocol
– Medical evaluation: Even without apparent injury, seek professional assessment. Adrenaline masks pain; some injuries manifest later.
– Ladder quarantine: Tag ladder “DO NOT USE.” Document incident details: time, conditions, observations.
– Reporting: Consider reporting to relevant consumer safety authorities if ladder malfunction is suspected. This contributes to broader safety awareness.
– Review: Conduct a thoughtful analysis: What step in the framework requires reinforcement? How can the system be strengthened? Share learnings respectfully.
Critical Reminder: Your response in the first moments determines outcomes. Familiarize yourself with this protocol beforehand. Keep emergency contacts readily accessible. Place a well-stocked first-aid kit near your ladder storage area.
Your Questions, Answered
Q: How often should I replace my ladder, even if it looks fine?
A: There is no universal expiration date, but all materials degrade over time. Fiberglass exposed to sunlight gradually loses strength. Aluminum experiences metal fatigue from repeated use. Wood dries and cracks. Inspect rigorously before every use. Retire immediately if: labels are unreadable (indicating significant exposure), feet are hardened or cracked, or rails show discoloration (fiberglass) or pitting (aluminum). When uncertain, replace. For home use with proper storage and flawless inspection history, many safety professionals suggest evaluating ladders thoroughly after 8–10 years of service.
Q: Can I use a ladder on a staircase or landing?
A: Standard ladders are unsafe on stairs due to uneven support creating extreme tipping risk. Instead:
– Use a specialized stairway ladder (designed with offset feet)
– Rent a scaffold system rated for stairwells
– For very low tasks (<4 ft), use a sturdy step stool only if all feet contact solid surfaces
Never improvise with books, boxes, or furniture under ladder feet on stairs—this is a documented cause of serious falls.
Q: What’s the safest way to carry tools up a ladder?
A: Tool belts are ideal for small items (screwdrivers, tape measure). For larger tools:
1. Secure ladder and have spotter near base
2. Attach tools to a rope bag before climbing
3. Climb to position using three-point contact
4. Call “Heads up!” then have spotter hoist bag
5. Retrieve bag only after securing yourself
Never carry tools in teeth, armpits, or hands while climbing. Falling objects pose serious hazards below.
Q: Are rubber-soled shoes enough for ladder safety?
A: Not always. Smooth rubber soles (like casual sneakers) offer poor grip on dusty or damp rungs. Opt for footwear with deep, defined tread patterns and slip-resistant ratings. Ensure soles are clean—mud or grease reduces friction. Avoid sandals, flip-flops, or socks-only. In wet conditions, consider rung covers with aggressive tread patterns.
Q: How do I safely move a ladder while standing on it?
A: You don’t. This is non-negotiable. “Walking” a ladder while elevated creates twisting forces that can collapse rails or shift the base unexpectedly. Always descend completely, reposition the ladder base, verify stability, then re-climb. It adds minimal time but eliminates a leading cause of falls. If frequent repositioning is needed (e.g., painting a long wall), consider a scaffold system or motorized lift for efficiency and safety.
Q: Can I repair a small crack in a fiberglass ladder with epoxy?
A: Absolutely not. Fiberglass derives strength from continuous glass fibers suspended in resin. A crack severs these fibers. Epoxy fills the gap but cannot restore structural integrity—it creates a weak point prone to sudden failure under load. Ladder manufacturers universally prohibit field repairs. Retire the ladder immediately. Contact the maker; many have take-back programs. Document the retirement to reinforce safety culture.
Q: What’s the difference between OSHA and ANSI ladder standards?
A: ANSI (American National Standards Institute) develops voluntary consensus standards (e.g., ANSI A14.2 for portable metal ladders) through committees of manufacturers, safety experts, and users. OSHA (Occupational Safety and Health Administration) adopts specific ANSI provisions into mandatory federal regulations for workplaces. For home DIYers, ANSI standards represent the engineering best practices that inform all safety guidance. While OSHA rules don’t legally apply to personal home use, they codify lessons from real incidents—making them essential references for safe practice. Always choose ladders displaying current ANSI certification labels.
Q: Is it safer to have someone “spot” me by holding the ladder base?
A: Generally, no. A person holding the base introduces instability: human reaction time is too slow to prevent sliding, and their presence creates a crush hazard if the ladder falls inward. Proper setup (correct angle, secured base, level surface) is far more reliable. Exceptions may include:
– Extremely slippery surfaces where mechanical securing isn’t feasible
– Situations involving documented mobility concerns (under professional guidance)
In these cases, the spotter should brace against the base area with their body (not hold rails), stand clear of the potential fall zone, and communicate clearly. However, addressing the root cause (surface condition) is always preferable to relying on human intervention.
Q: How do I check if my ladder’s duty rating is sufficient?
A: Calculate total load:
1. Your weight (including clothing)
2. Weight of all tools you’ll carry
3. Weight of materials you’ll handle
4. Add a small safety buffer
Example: 180-lb person + 10-lb tool belt + 15-lb paint can = 205 lbs. Add buffer = ~225 lbs. This requires at least Type I (250-lb rating). Never rely on “feeling” if the ladder is sturdy—load capacity is an engineering specification. When purchasing, choose the next higher duty rating than your calculated need for margin.
Q: Can storage conditions indoors still affect ladder safety?
A: Yes. Temperature fluctuations and humidity cause material stress even in garages or sheds:
– Fiberglass: Prolonged heat exposure can soften resin; cold temperatures may reduce flexibility
– Aluminum: Humidity causes corrosion at joints; temperature swings contribute to metal fatigue
– Wood: Humidity causes swelling/warping; dryness leads to cracking
Store ladders horizontally in stable environments when possible. Avoid attics (extreme heat) and damp basements. Inspect stored ladders periodically even if unused—degradation continues silently.
Q: What should I do if I feel dizzy while on the ladder?
A: Stop all movement. Grip the rails firmly with both hands. Take slow, deep breaths. Call for assistance calmly. Do not attempt to climb down immediately. Wait until the sensation passes or help arrives. If dizziness is recurrent, consult a healthcare professional before undertaking elevated tasks. Prevention includes staying hydrated, avoiding work during peak heat, and taking regular breaks.
Q: Are ladder accessories like levelers or mitts worth using?
A: For challenging conditions, yes. Purpose-built accessories address specific risks:
– Levelers compensate for uneven ground safely
– Mitts increase base friction on smooth surfaces
– Stabilizers distribute weight on gutters or fragile surfaces
Choose accessories rated for your specific ladder model. Avoid improvised solutions (ropes, duct tape, loose wood blocks), which introduce new hazards. Quality accessories are investments in reliable setup.
Conclusion: Making Safety a Habit
Ladder safety isn’t about fear—it’s about freedom. Freedom from anxiety while working at height. Freedom to focus entirely on your project, not your footing. Freedom to return home unharmed to those who depend on you. This framework transforms abstract warnings into tangible actions you control. You now hold a complete system: selecting with precision, inspecting with diligence, setting up with physics-informed accuracy, moving with deliberate technique, working within defined boundaries, descending with mindfulness, and caring for your equipment with respect. These aren’t restrictions; they’re the scaffolding for confidence.
Recap: The Three Foundational Practices
- The 4-to-1 Angle Rule for extension ladders—verified visually and physically every time.
- Three-Point Contact maintained during all climbing movements—without exception.
- The Overreach Boundary—hips and shoulders always centered between rails; reposition instead of stretching.
The 24-Hour Rule
Within the next 24 hours, take one concrete action: Locate your ladder. Conduct the full Pre-Use Inspection Protocol from Step 2. Clean the feet. Verify all locks function. If stored improperly, reposition it horizontally on supports. This single act closes the loop between knowledge and practice. It transforms this guide from information into ingrained habit. Set a phone reminder if needed—your future self will thank you.
The Big Picture
Every safe climb reinforces neural pathways. Every deliberate repositioning builds muscle memory. Soon, these steps feel as natural as fastening a seatbelt. You become the safety advocate in your community—calmly sharing the belt-buckle test with a neighbor, suggesting plywood pads for soft ground, modeling patience over haste. This ripple effect prevents injuries beyond your own projects. Safety is contagious. Choose to spread competence, not complacency. Your projects matter. Your well-being matters more. Climb with purpose. Work with confidence. Return home safely—every single time.
Explore Our Complete System:
The Homeowner’s Guide to Electrical Safety During Renovations | Mastering Tool Maintenance: Extend Lifespan and Precision | Fall Protection Fundamentals for Roof Work | Creating a Family Safety Plan for Home Projects | Smart Storage Solutions for Garage Organization and Safety | Understanding Building Codes for Common DIY Projects | First Aid Preparedness: Essential Skills for Workshop and Garden Emergencies | Seasonal Home Maintenance Checklist: Spring to Winter Safety Transitions