Break the cycle of chemical dependence and cultivate a resilient landscape through intelligent design and ecological harmony.
Weeds aren’t your enemy—they’re messengers. They reveal imbalances in soil health, moisture levels, and ecosystem dynamics that, when understood, transform your approach from frantic reaction to thoughtful stewardship. This comprehensive guide moves far beyond fragmented tips and temporary fixes. You’ll discover a cohesive, four-layer defense framework synthesized from agricultural extension research, ecological gardening principles, and documented applications across diverse climates. By working with natural systems—not against them—you’ll build a garden that naturally suppresses weeds while nurturing richer soil, vibrant plant life, and greater biodiversity. No chemicals. No guilt. Lasting results rooted in observable patterns and ecological wisdom.
Introduction
Walk into any garden center, and you’ll find aisles dedicated to chemical solutions: synthetic herbicides promising rapid results, plastic barriers claiming long-term suppression, and quick-fix tools designed for repetitive labor. Yet season after season, many gardeners remain trapped in the same exhausting cycle: spray, pull, repeat. Why? Because isolated approaches often treat symptoms while overlooking underlying conditions. Weeds flourish not due to gardener negligence, but because ecosystems seek equilibrium. When soil is compacted, nutrient-imbalanced, or left bare, nature fills the void with resilient pioneer species we label “weeds.” Dandelions often signal soil needing aeration. Chickweed may indicate areas with consistent moisture. Purslane commonly appears where organic matter is low. These aren’t invaders to be annihilated—they’re diagnostic clues pointing toward healing.
This guide reframes the entire conversation. Drawing from research by institutions like the Rodale Institute, University of California Cooperative Extension, and decades of permaculture fieldwork, we present organic weed management not as a battle but as ecosystem stewardship. Meaningful progress emerges when strategies align with ecological principles: building soil biology, maximizing living cover, and leveraging plant competition. You’ll learn why a single “magic solution” doesn’t exist—and why that’s liberating. Instead, you’ll assemble a personalized toolkit where each technique reinforces the others, creating compounding benefits over time. Within one growing season, many gardeners report a significant reduction in weeding labor. Within a few years, weeds often shift from dominant pressures to occasional indicators of garden dynamics. These outcomes are supported by documented experiences from community gardens, suburban yards, and homesteads across North America and Europe. Your journey begins not with pulling a single weed, but with shifting perspective: from eradication to cultivation, from conflict to collaboration.
The Four-Layer Defense Framework: Your Blueprint for Sustainable Weed Management
Imagine constructing a resilient landscape. You wouldn’t rely solely on one tactic—you’d integrate multiple supportive layers, each compensating for the others’ limitations. Organic weed management operates on the same principle. Isolated tactics often falter because weeds adapt. Pull dandelions without addressing soil structure, and they may return. Smother weeds without nurturing soil biology, and you might create new imbalances. The Four-Layer Defense Framework eliminates fragmentation. Synthesized from sustainable agriculture research and field-tested protocols, this system creates synergistic resilience where each layer amplifies the next. Prevention reduces opportunities for new weeds. Suppression blocks existing seeds from gaining traction. Elimination addresses persistent plants thoughtfully. Restoration rebuilds ecosystem balance so desired plants thrive. Crucially, this isn’t linear—it’s cyclical. Actions in Layer 4 (Restoration) directly strengthen Layer 1 (Prevention), creating a self-reinforcing loop of garden health. Let’s explore each layer with actionable steps, regional considerations, and practical adaptations.
Layer 1: Prevention – Reducing Opportunities Before Weeds Establish
Prevention is the most impactful yet frequently overlooked layer. Conventional gardening often begins after weeds appear, but ecological wisdom starts long before the first seed germinates. Prevention targets the “weed seed bank”—the reservoir of dormant seeds beneath your soil. A single purslane plant can produce tens of thousands of seeds viable for many years. Bindweed seeds may remain dormant for decades. Prevention isn’t about perfection; it’s about systematically reducing this seed bank while making your garden less hospitable to new arrivals. This layer requires thoughtful upfront effort but yields compounding time savings later. Think of it as installing foundational safeguards before challenges arise—not just responding after they occur.
The Soil Health Foundation: Nurturing Conditions Where Desired Plants Thrive
Healthy soil is a living ecosystem where microbes, fungi, earthworms, and plant roots collaborate. Weeds often exploit temporary imbalances. Compacted soil? Dandelions and plantains send deep taproots seeking resources. Low nitrogen availability? Clover may appear, signaling a need. Prevention begins by nurturing soil biology so desired plants compete effectively.
Soil Assessment Beyond pH: Many gardeners test pH but miss other indicators. Consider sending a sample to your local cooperative extension service (many offer affordable analysis). Request insights on:
– Organic Matter Percentage: Ideal ranges vary by soil type and region. Generally, 3–5% supports good structure and microbial activity. Below 2% may indicate a need for organic amendments.
– Cation Exchange Capacity (CEC): Reflects soil’s ability to hold nutrients. Lower values may require more frequent, smaller amendments.
– Biological Activity: Some labs offer respiration tests. Alternatively, perform a simple “earthworm census”: dig a 12″x12″x6″ hole. Finding fewer than 5 earthworms may suggest room for improvement in soil biology.
Example: A gardener in Ohio noticed persistent chickweed in vegetable beds. Soil tests revealed acceptable pH but low organic matter. They amended with composted leaf mold each fall. Over two seasons, chickweed presence reduced noticeably as soil structure and microbial diversity improved.
Building Living Soil Step-by-Step:
1. Amend Thoughtfully: Apply 1–2 inches of well-aged compost (not fresh manure) to beds each spring or fall. Compost introduces beneficial microbes and improves water retention.
2. Avoid Bare Soil: Never leave soil exposed unnecessarily. After harvest, plant cover crops (see Layer 4) or apply mulch promptly.
3. Minimize Soil Disturbance: Tilling can bury weed seeds at ideal germination depths and disrupt fungal networks. Consider no-till or low-till methods: use a broadfork to aerate without inverting soil layers.
4. Support Microbial Life: Some gardeners apply diluted molasses (¼ cup per gallon of water) occasionally during the growing season to feed soil bacteria. Always research suitability for your specific context.
Common Consideration: Over-applying nitrogen-rich amendments may encourage lush growth in opportunistic plants like lambsquarters. Balance with carbon-rich materials like straw or shredded leaves.
Strategic Mulching Mastery: Nature’s Protective Layer
Mulch serves as prevention’s frontline support—but only when matched to your garden’s needs. It blocks light to weed seeds, conserves moisture for crops, moderates soil temperature, and feeds soil as it decomposes. Yet improper mulching can create new challenges: thick wood chips may hinder seedling emergence; straw contaminated with seeds spreads invaders; plastic sheeting may create anaerobic conditions.
Choosing Your Mulch Material:
| Material | Best For | Ideal Depth | Key Considerations |
|——————-|———————————–|————-|———————————————————————————-|
| Shredded Leaves | Vegetable beds, perennial borders | 2–3 inches | Free resource; improves soil structure. Shred to prevent matting. Avoid walnut leaves in sensitive gardens (potential juglone sensitivity). |
| Straw | Vegetable gardens, pathways | 3–4 inches | Use straw (grain stalks), not hay (often contains seeds). Verify source is weed-free. |
| Wood Chips | Paths, around trees/shrubs | 3–4 inches | Arborist chips (mixed sizes) work well. Keep 3+ inches from plant stems to prevent moisture retention against bark. |
| Grass Clippings| Quick coverage between rows | 1 inch (dry)| Apply thin, dry layers to avoid mats. Never use if treated with herbicides. |
| Cardboard | Smothering existing vegetation | Single layer| Remove tape/labels. Overlap seams by 6 inches. Cover with organic mulch to weigh down and accelerate decomposition. |
| Pine Needles | Acid-preferring plants | 2–3 inches | Slow to decompose. Excellent for sloped areas (interlocks to reduce washout). |
Pro Tip: Layer materials for synergy. Place cardboard over weedy areas, then top with 3 inches of wood chips. The cardboard blocks light; chips prevent wind displacement and feed fungi as they decompose.
Application Protocol:
1. Clear First: Remove visible weeds before mulching. Mulch alone won’t eliminate established perennials like bindweed.
2. Moisten Soil: Water soil thoroughly before applying mulch. Dry soil under mulch may wick moisture away from plant roots.
3. Define Edges: Install edging to keep mulch contained and reduce grass invasion.
4. Refresh Seasonally: Top up decomposed mulch in spring. In humid climates, fluff mulch mid-summer to discourage fungal growth.
Regional Adaptation: In rainy Pacific Northwest regions, avoid thick straw mulch which may mat and encourage slugs; coarse wood chips often perform better. In arid Southwest gardens, extend mulch to the drip line of trees to conserve moisture.
Smart Garden Design Principles: Engineering Resilience
Your garden layout itself influences weed pressure. Conventional row planting leaves soil exposed between crops—a potential opening for opportunistic plants. Ecological design minimizes these gaps through intentional spacing and plant partnerships.
Dense Planting Strategies:
– Block Planting: Group plants in hexagonal blocks instead of rows. Lettuce spaced 6 inches apart in a block shades soil faster than rows spaced 12 inches apart.
– Companion Guilds: Plant mutually supportive species. Example: “Three Sisters” (corn, beans, squash). Corn provides structure, beans fix nitrogen, squash vines shade soil.
– Succession Sowing: As one crop matures (radishes), sow the next (carrots) directly into the same space. Minimizing bare soil reduces opportunities for weeds.
Example: A community garden in Portland substantially reduced weeding labor by switching to block planting with living mulches (white clover between tomato plants). Clover suppressed opportunistic plants, contributed nitrogen, and attracted pollinators—without competing significantly with deep-rooted tomatoes.
Irrigation Intelligence: Overhead watering nourishes all plants equally. Drip irrigation or soaker hoses deliver water primarily to desired plant roots. Install drip lines under mulch for efficiency. In vegetable beds, space emitters based on plant needs; for trees, encircle the drip line with tubing.
The Fundamental Principle: Weeds are opportunistic pioneers responding to ecosystem gaps. By designing gardens that maximize living cover, support soil biology, and minimize resource voids, you reduce the very conditions weeds require to establish—transforming prevention from a chore into an inherent garden function.
Layer 2: Suppression – Creating Supportive Barriers at the Seedling Stage
Even with robust prevention, some seeds will germinate. Suppression intercepts them early—before they establish deep roots or produce seeds—using physical, thermal, or biological barriers. This layer requires observation but minimal labor when timed thoughtfully. The goal isn’t total elimination (ecologically unrealistic) but consistent reduction of the seed bank through strategic intervention.
Living Mulches and Ground Covers: The Green Network
Living mulches are low-growing, non-invasive plants that form dense mats, shading soil and competing with opportunistic seedlings through root activity. Unlike inert mulches, they actively improve soil, attract beneficial insects, and enhance biodiversity. Selection is critical: choose species adapted to your light, moisture, and climate conditions.
Top Living Mulch Options by Garden Context:
– Full Sun, Well-Drained Soil: Creeping thyme (Thymus serpyllum), Roman chamomile (Chamaemelum nobile), or dwarf white clover (Trifolium repens ‘Pipolina’). Thyme tolerates light foot traffic; clover contributes nitrogen.
– Partial Shade: Ajuga (Ajuga reptans), sweet woodruff (Galium odoratum), or barren strawberry (Waldsteinia fragarioides). Ajuga spreads readily—ideal for large areas but contain with edging.
– Dry Shade (Under Trees): Epimedium (Epimedium spp.), lamium (Lamium maculatum), or pachysandra (Pachysandra terminalis). These tolerate root competition.
– Vegetable Beds (Temporary): Buckwheat (Fagopyrum esculentum) or crimson clover (Trifolium incarnatum). Sow between crop rotations; chop and drop before flowering.
Establishment Protocol:
1. Prepare Soil: Remove existing weeds. Lightly rake soil for seed-to-soil contact.
2. Sow Strategically: For seeds, mix with sand for even distribution. For plugs, space 6–12 inches apart depending on spread rate.
3. Water Consistently: Keep soil moist until established (2–4 weeks). Once rooted, most living mulches require minimal care.
4. Manage Growth: Trim edges monthly with shears to prevent invasion into desired plant zones. For clover in vegetable beds, mow to 2 inches when it reaches 4 inches tall.
Safety Note: Avoid species known to be invasive in your region (e.g., periwinkle Vinca minor, English ivy Hedera helix). Consult your state’s invasive plant council before planting.
Documented Insight: Research from Michigan State University observed vegetable plots with white clover living mulch had substantially fewer weeds than bare-soil plots, with no reduction in tomato yield. Clover also increased pollinator visits significantly.
Physical Barriers: Cardboard, Paper, and Fabric Applied Thoughtfully
Physical barriers block light while allowing water penetration. When installed correctly, they suppress weeds for months to years with no chemical inputs. Misapplication, however, can cause issues—trapping moisture against stems, degrading into fragments, or creating new germination surfaces.
Cardboard Smothering Technique (The “Lasagna Method”):
1. Mow Vegetation Low: Cut existing growth to ground level. Root removal isn’t always necessary.
2. Water Area Thoroughly: Saturate soil to activate decomposition microbes.
3. Lay Cardboard: Use plain brown cardboard (no glossy prints, tape, or staples). Overlap sheets by 6–8 inches.
4. Add Weight: Immediately cover with 3–4 inches of organic mulch (wood chips, straw). Prevents wind lift and accelerates breakdown.
5. Plant Through: For new plantings, cut X-shaped slits in cardboard, fold flaps down, and dig holes. Water deeply after planting.
Why Cardboard Works: Cardboard’s layered cellulose structure blocks light while decomposing gradually (6–18 months). Earthworms and fungi consume it, incorporating carbon into soil. Unlike plastic, it allows gas exchange.
Landscape Fabric: When and How to Use Responsibly
Fabric has a narrow, specific use case: under permanent hardscapes (patio stones, gravel paths) where no planting occurs. Generally avoid under garden beds or around plants. Why?
– Fabric degrades over time.
– Soil and organic matter can accumulate on top, creating a germination layer.
– Roots of desired plants may grow into fabric, complicating future changes.
– Moisture trapped against stems may promote rot.
If Using Fabric:
– Choose woven polypropylene (not plastic sheeting).
– Install only under gravel paths. Overlap seams by 6 inches; secure with landscape staples.
– Cover completely with 2+ inches of gravel. Never leave exposed.
– Plan for eventual replacement.
Newspaper Alternative: For smaller areas, use 8–10 sheets of black-and-white newspaper (no colored ink). Wet thoroughly before applying mulch on top. Decomposes faster than cardboard (3–6 months) but effective for seasonal suppression.
Thermal Suppression: Solarization and Flame Weeding
Heat offers chemical-free intervention for specific scenarios. Unlike herbicides, thermal methods leave no residue—but require precise timing and safety awareness.
Soil Solarization for Targeted Areas:
Ideal for converting weedy areas into garden beds or preparing soil before planting heat-sensitive crops. This technique uses solar energy to raise soil temperatures, reducing weed seeds, pathogens, and pests.
Step-by-Step:
1. Timing: Begin in early summer during longest, hottest days (soil temp must reach sustained highs for 4–6 weeks).
2. Prepare Soil: Remove large debris. Water deeply (moist soil conducts heat better).
3. Cover: Stretch clear 1–1.5 mil plastic sheeting tightly. Bury edges 6 inches deep to seal heat.
4. Wait: Leave undisturbed for 4–6 weeks. Soil temperature at 2-inch depth should consistently reach target ranges.
5. Remove: After treatment, remove plastic. Incorporate decomposed organic matter. Allow soil biology to recover before planting.
Critical Nuance: Solarization affects soil microbes. Always follow with compost or compost tea to reintroduce biology. Less effective in cool climates or shaded areas.
Flame Weeding for Hardscapes and Pathways:
Propane torches deliver targeted heat to weeds in cracks, driveways, or between pavers. Heat ruptures plant cells, causing wilting. Never use near dry vegetation, wood structures, or on windy days.
Safe Protocol:
– Use a dedicated weed torch with adjustable flame.
– Pass flame quickly over weeds (1–2 seconds per plant). Goal is cell disruption, not charring.
– Best done on dry, sunny mornings when plants are turgid.
– For driveways: sweep debris first. Torch weeds in cracks; follow with joint sand.
– Safety First: Keep fire extinguisher nearby. Check local regulations. Never leave torch unattended.
Effectiveness Note: Flame weeding affects top growth but not deep roots of perennials (dandelions, bindweed). Requires repeat treatments. Highly effective on young annuals.
Layer 3: Elimination – Targeted Removal with Minimal Disturbance
Despite prevention and suppression, persistent plants will emerge. Elimination addresses these thoughtfully—removing plants while minimizing soil disturbance and preserving ecosystem integrity. Precision is key: matching the method to the plant’s growth habit. Yanking a dandelion without its taproot invites regrowth. Thoughtful elimination turns a chore into informed stewardship.
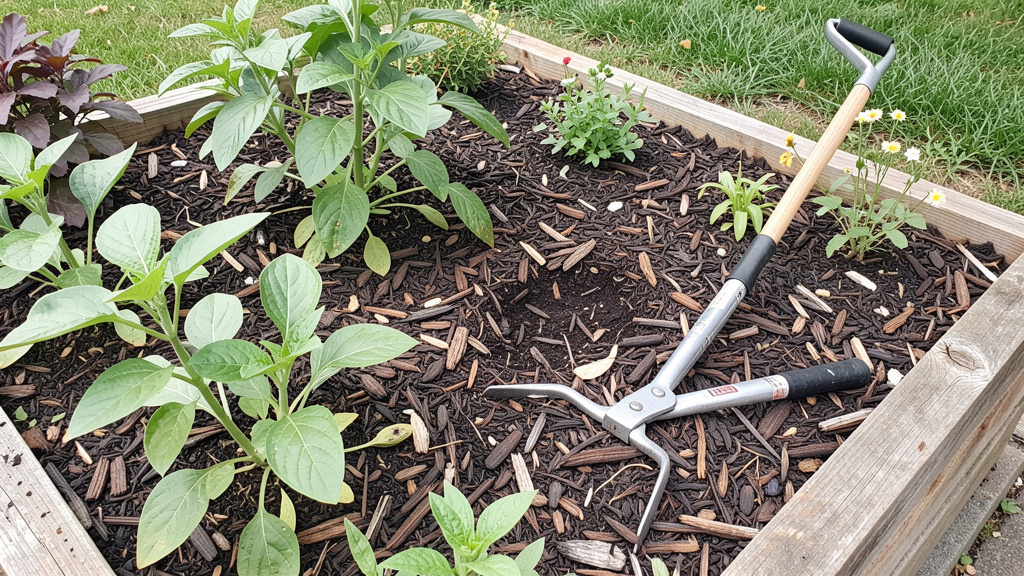
Hand-Weeding Techniques for Different Growth Habits
Hand-weeding remains highly selective when done correctly. It leaves no residue and provides intimate knowledge of your soil’s condition. Success hinges on understanding root structures and timing removal for maximum impact.
Tool Selection Guide:
| Plant Type | Recommended Tool | Technique |
|—————————|————————————–|—————————————————————————|
| Taproots (dandelion, dock) | Dandelion digger, hori-hori knife | Insert tool vertically beside root. Lever gently to loosen soil. Pull slowly while wiggling root free. |
| Spreading Rhizomes (quackgrass, bindweed) | Hand trowel, fork | Excavate 6+ inches around plant. Remove all root fragments—tiny pieces may regrow. Sift soil carefully. |
| Shallow Mats (chickweed, purslane) | Hand claw, weeding knife | Slice horizontally 1 inch below soil surface. Lift entire mat. Shake soil off roots before disposal. |
| Cracks in Hardscapes | Old steak knife, grout tool | Scrape vertically along crack edge. Remove roots completely. |
Pro Timing Insight: Weed after rain or deep watering when soil is moist. Roots release more easily. Early morning is often ideal—cooler temperatures reduce stress.
The “Shake and Sort” Protocol:
1. Place removed plants in a bucket (prevents seed scatter).
2. Shake soil from roots back into garden—this soil contains valuable microbes and nutrients.
3. Critical Sorting:
– Compost Safe: Annual plants before flowering (chickweed, lambsquarters). Chop finely to accelerate decomposition.
– Hot Compost Only: Perennials with seeds or rhizomes (bindweed, quackgrass). Requires pile reaching sustained high temperatures to kill viability. When in doubt, bag and solarize.
– Dispose Responsibly: Invasive species (Japanese knotweed), diseased plants, or plants with mature seeds. Bag in black plastic, solarize for several weeks (place in hot sun until contents decompose), then follow local disposal guidelines.
Ergonomic Adaptation: For gardeners with mobility considerations:
– Use a kneeling bench with tool pouch.
– Attach extended handles to tools.
– Work in short sessions to avoid strain.
– Focus efforts on high-priority areas first.
Natural Herbicide Solutions: Targeted Spot-Treatment with Awareness
When physical removal isn’t feasible, targeted natural solutions offer spot-treatment options. Crucially, these are not systemic herbicides. They lack residual activity, require direct contact, and work best on young plants. Misuse can harm soil biology or desired plants. Use sparingly as a precision tool—not a broadcast solution.
Science-Informed Options:
| Solution | Mixing Guidance | Best For | Important Considerations |
|————————-|————————————————–|———————————–|—————————————————————————|
| Vinegar-Soap Spray | 1 gal 5% acetic vinegar + 1 oz dish soap | Driveways, patios, gravel paths | Avoid in garden beds. Salt additions risk long-term soil changes. Test on inconspicuous area first. |
| Citrus Oil Boost | Add small amount of orange oil to vinegar-soap | Tough perennials (bindweed) | Increases penetration but raises cost. Still ineffective on deep roots. |
| Boiling Water | Pour directly from kettle | Cracks in pavement, brick joints | Kills everything it contacts. Avoid near desirable plants. Reapply as needed. |
| Corn Gluten Meal | Apply per product instructions | Lawns, established beds | Only prevents germination—does nothing to existing plants. Apply weeks before typical seed sprouting. Avoid in newly seeded areas. |
Why Vinegar Alone Has Limits: Household vinegar (5% acetic acid) desiccates top growth but rarely kills roots of perennials. Plants like dandelions often regrow. Adding soap helps solution cling to waxy leaves. Reserve for hardscapes only.
Responsible Application Protocol:
1. Spot-Treat Only: Use a small spray bottle. Shield nearby plants with cardboard.
2. Target Young Plants: Most effective on seedlings under 2 inches tall.
3. Time of Day: Apply on hot, sunny mornings. Heat accelerates effect.
4. Reapply Strategically: For perennials, reapply every 7–10 days until root reserves deplete (typically multiple treatments).
5. Soil Recovery: After treatment in garden areas, amend soil with compost if needed.
Myth Busting: “Homemade herbicides are always safe.” Not accurate. Concentrated vinegar causes skin/eye irritation. Salt alters soil chemistry. Always wear protection. When efficacy is low and risk is high, physical removal is often safer and more effective.
Biological Controls: Supporting Nature’s Balance
In specific scenarios, encouraging natural predators can help manage problematic plants. This approach requires research and patience but offers sustainable long-term support for invasive species where manual removal is challenging.
Documented Contexts:
– Leafy Spurge (Euphorbia esula): Flea beetles (Aphthona spp.) feed on spurge roots. Used in rangeland management in several western states.
– Purple Loosestrife (Lythrum salicaria): Galerucella beetles defoliate plants. Contributed to wetland restoration in Minnesota.
– Klamath Weed (Hypericum perforatum): Chrysolina beetles reduced infestations significantly in California rangelands—a landmark case in biological control.
Critical Considerations Before Proceeding:
– Never introduce non-native species casually. Consult your state’s department of agriculture or cooperative extension. Many “beneficial” insects become problematic themselves.
– Biological control works at landscape scale, not typical backyard gardens. Requires large, contiguous areas to sustain populations.
– Patience is essential: Results take years. Not a quick fix.
– Ethical Responsibility: Only use agents approved for your region after rigorous host-specificity testing.
Practical Alternative for Home Gardeners: Encourage existing beneficial insects. Plant umbel flowers (dill, fennel, yarrow) to attract parasitic wasps. Create habitat piles (logs, rocks) for ground beetles that consume seeds. This supports ecosystem balance without introducing risks.
Layer 4: Restoration – Rebuilding and Reinforcing Your Ecosystem
Elimination creates openings. Without intentional restoration, opportunistic plants may return. This final layer closes the loop: rebuilding soil health, reintroducing competitive plants, and monitoring dynamics to strengthen all previous layers. Restoration transforms weed management from reactive maintenance into proactive ecosystem cultivation.
Soil Amendment After Plant Removal
Every time you remove plants, you extract nutrients and disturb soil structure. Restoration replenishes what was lost while improving conditions for desired plants.
Post-Removal Soil Protocol:
1. Assess Disturbance Level:
– Light Removal (hand-pulling seedlings): No amendment needed. Lightly scratch compost into surface.
– Moderate Disturbance (digging taproots): Fill holes with 50/50 mix of compost and native soil.
– Heavy Disturbance (sod removal, deep excavation): Amend entire area with compost. Cover with straw mulch until replanting.
2. Reinoculate Biology: Some gardeners spray area with compost tea (steep compost in water for 24 hours; strain). This reintroduces microbes displaced during removal.
3. pH Adjustment: If soil tests indicate imbalance, apply amendments before replanting per local recommendations.
Seasonal Timing: In fall, focus on cover crops. In spring, prioritize compost application before planting season peaks.
Cover Crops: The Living Armor
Cover crops are fast-growing plants sown to protect and enrich soil during downtime. They suppress opportunistic plants through dense growth, prevent erosion, fix nitrogen, and feed soil life. Often called “green manure,” they’re chopped and incorporated before flowering.
Top Cover Crops by Purpose:
| Goal | Best Cover Crop | Planting Time | Termination Method |
|————————–|————————–|——————–|—————————————-|
| Weed Suppression | Buckwheat | Early summer | Mow at flowering; incorporates easily |
| Nitrogen Contribution| Crimson Clover | Late summer | Cut before bloom; leave roots in soil |
| Soil Aeration | Daikon Radish | Late summer | Winter-kills; roots decompose in place |
| Erosion Control | Annual Rye | Early fall | Mow in spring; till under or smother |
| All-Purpose Mix | Regional cover crop mix | Fall | Mow before seed set |
Step-by-Step Establishment:
1. Clear Area: Remove large weeds. Lightly rake soil.
2. Sow Seeds: Broadcast seeds evenly. For small areas, mix seeds with sand for visibility.
3. Incorporate: Rake lightly to cover seeds ¼ inch deep. Water gently.
4. Maintain: Keep moist until germination (5–10 days). Once established, requires minimal care.
5. Terminate: Cut cover crop at soil line just before flowering. Leave cuttings on soil as mulch (“chop and drop”) or compost.
Documented Insight: USDA research observed fields planted with cereal rye cover crop had substantially fewer weeds the following season compared to bare fallow fields. Rye releases natural compounds that suppress seed germination—a phenomenon called “allelopathy.”
Competitive Planting and Succession Strategies
Nature fills openings. After removing plants, promptly replant with vigorous, well-adapted species to occupy the space.
Fast-Growing Fillers for Bare Spots:
– Full Sun: Alyssum (attracts hoverflies), calendula, or nasturtiums.
– Partial Shade: Creeping Jenny (Lysimachia nummularia ‘Aurea’), sweet woodruff.
– Vegetable Gaps: Radishes (mature quickly), spinach, or mesclun mix.
Succession Planting Example (Adapt to Your Zone):
– Early Spring: After harvesting overwintered kale, sow quick radishes.
– Late Spring: As radishes finish, transplant tomatoes with basil companions.
– Mid-Summer: When lettuce bolts, sow bush beans in the same spot.
– Early Fall: After bean harvest, plant garlic or cover crop.
Pro Tip: Keep a “gap-filler” seed kit ready: small packets of radish, arugula, and alyssum stored in your garden shed. When you spot a bare patch, sow within 24 hours.
Monitoring and Adaptive Management
Restoration isn’t “set and forget.” Regular observation builds intuitive understanding, catching imbalances before opportunistic plants exploit them.
The Garden Journal Protocol:
– Weekly Scan: Spend 10 minutes walking your garden. Note:
– Plants Emerging: What might they indicate? (See Introduction)
– Soil Condition: Cracked? Waterlogged? Crusty?
– Plant Health: Yellowing leaves? Stunted growth?
– Seasonal Audit: Each equinox, assess:
– Mulch depth (replenish if thin)
– Bare soil percentage (minimize exposure)
– Tool condition (sharpen blades, oil handles)
– Adaptive Response Examples:
– Observation: Increased chickweed in shaded bed.
– Diagnosis: Soil staying too moist; insufficient light for desired plants.
– Action: Thin overhanging branches; replace with shade-tolerant species; improve drainage.
This cyclical process—observe, diagnose, act—builds expertise. Over time, you’ll anticipate pressures before they manifest, shifting from constant reaction to confident prevention.
Special Scenarios: Tailoring Your Strategy to Common Challenges
No garden exists in isolation. Soil type, climate, space constraints, and specific plant pressures demand nuanced adaptations of the core framework. This section translates universal principles into targeted solutions for high-friction scenarios gardeners face daily. Each strategy integrates all four layers while addressing unique constraints.
Weed Management in Vegetable Gardens: Precision Amidst Productivity
Vegetable gardens present unique considerations: frequent soil disturbance during planting/harvest, close plant spacing, and sensitivity to methods affecting crops. Success hinges on layering prevention with surgical elimination.
Seasonal Workflow:
– Pre-Planting (Spring):
– Solarize beds if heavily infested (4 weeks minimum).
– Apply compost + light raking (minimal soil disturbance).
– Install drip irrigation before planting to avoid watering between crops.
– Planting Phase:
– Use block planting with tight spacing (e.g., carrots 1 inch apart in blocks).
– Sow living mulch (white clover) between tomato/pepper rows where appropriate.
– Apply straw mulch after seedlings emerge (prevents smothering).
– Growing Season:
– Weekly “weed walk” with hori-hori knife—remove seedlings under 2 inches.
– For pathways between beds: lay cardboard topped with wood chips.
– If plants emerge near crops, use “spot mulching”: tuck small straw bundles around base of plants.
– Post-Harvest (Fall):
– Immediately sow cover crop (buckwheat for quick suppression; rye for winter).
– Never leave soil bare after crop removal.
Critical Nuance for Seedlings: When direct-sowing carrots or lettuce, opportunistic plants often emerge first. Solution: Pre-irrigate beds 7–10 days before planting to trigger a “flush” of seeds. Lightly hoe surface to eliminate them. Wait 2 days, then sow crop seeds. This “stale seedbed” technique can significantly reduce weeding during critical seedling stages.
Safety First with Natural Sprays: Never spray vinegar solutions near vegetable foliage. Even diluted, acetic acid can damage tender leaves. Reserve thermal methods for pathways only—never between crops.
Cultivating Resilient Lawns: Shifting the Goal from “Weed-Free” to “Thriving”
A completely uniform lawn is ecologically challenging—and often undesirable. Clover fixes nitrogen; dandelions support early pollinators; violets provide habitat. The goal shifts to managing plant diversity while fostering dense, healthy turf that naturally suppresses opportunistic species. Chemical herbicides can weaken grass roots over time, creating dependency cycles.
The Organic Lawn Care Cycle:
1. Soil Foundation (Spring):
– Core aerate compacted areas.
– Top-dress with thin layer of compost to improve biology.
– Apply corn gluten meal only if soil test and timing align (pre-emergent for crabgrass).
2. Mowing Intelligence:
– Set mower height to 3–3.5 inches. Taller grass shades soil, reducing seed germination.
– Never remove more than ⅓ of blade height at once.
– Leave grass clippings—they return nutrients to soil.
3. Watering Wisdom:
– Water deeply (1 inch) once weekly rather than daily sprinkles. Encourages deep grass roots.
– Water early morning to reduce disease pressure.
4. Targeted Intervention:
– For dandelions: After rain, use dandelion digger to remove entire taproot. Fill hole with compost.
– For clover patches: Overseed thin areas with grass seed in fall. Clover thrives where nitrogen is low—healthy turf reduces its advantage.
– For moss: Address underlying cause (shade, compaction, acidity) rather than killing moss. Prune trees, aerate soil, apply lime if pH is low per soil test.
The Clover Conversation: Many gardeners now intentionally include micro-clover (Trifolium repens ‘Pipolina’) in lawns. Benefits:
– Stays green during droughts when grass goes dormant
– Contributes nitrogen, reducing fertilizer needs
– Soft texture, tolerates foot traffic
– Blooms attract bees (mow before flowering if allergies are a concern)
Mix a small percentage of clover seed with grass seed when overseeding. Result: a resilient, low-maintenance “eco-lawn” where clover is a feature, not a flaw.
Regional Adaptation: In hot, humid Southeast regions, focus on heat-tolerant grasses like zoysia. In cool-season Northern lawns, prioritize Kentucky bluegrass and fine fescues. Match grass type to your climate—struggling turf invites opportunistic plants.
Managing Hardscapes: Driveways, Patios, and Walkways
Plants in cracks exploit minimal soil but thrive due to protection and concentrated moisture. Chemical sprays risk runoff. Physical and thermal methods dominate this scenario.
Prevention During Installation:
– When laying new pavers or stones:
– Excavate adequately.
– Install geotextile fabric (woven polypropylene) over compacted base.
– Fill joints with polymeric sand (activates with water to form solid barrier).
– Slope surface slightly for drainage—standing water encourages growth.
Existing Hardscape Protocol:
1. Initial Clearance:
– Scrape plants from cracks with old knife or grout tool.
– Sweep debris thoroughly.
2. Joint Stabilization:
– Fill cracks with coarse sand (not fine sand which washes out).
– For brick patios: Use polymeric sand designed for joints. Sweep into cracks, mist with water to activate binding.
3. Ongoing Maintenance:
– Monthly: Sweep joints to remove organic debris (seeds, leaves).
– As Needed: Pour boiling water directly into cracks. Repeat every few days until roots cease.
– For Persistent Plants: Use propane torch briefly (1–2 seconds per spot). Test on inconspicuous area first—some stones may spall with heat.
– Natural Barrier: Some gardeners sprinkle cinnamon powder into cracks. Its properties may inhibit germination temporarily (non-toxic but temporary).
Safety Critical: Never use salt-based solutions on hardscapes near gardens. Rain washes salt into soil, causing long-term changes. Avoid vinegar on natural stone (limestone, marble)—acid may etch surfaces.
Eco-Friendly Alternative: Replace weedy gravel paths with permeable pavers set in crushed stone. Allows water infiltration while preventing growth. Higher initial cost but minimal long-term maintenance.
Addressing Persistent and Invasive Plants: Patience and Strategy
Some plants demand specialized strategies due to deep roots, aggressive spreading, or ecological impact. Bindweed chokes plants; quackgrass infiltrates lawns; Japanese knotweed requires professional attention. Patience and consistency trump brute force. The goal isn’t instant eradication (often unrealistic) but systematic reduction through repeated, informed intervention.
Species-Specific Approaches:
Bindweed (Convolvulus arvensis) – The Persistent Vine
– Biology: Spreads by seeds and rhizomes. Rhizomes extend deeply; fragments may regrow.
– Strategy: Exhaustion through repeated top removal.
– Step 1: Cut vines at soil line weekly. Avoid pulling—may break rhizomes.
– Step 2: Cover area with thick cardboard + 6 inches wood chips. Check monthly; cut any shoots penetrating barrier.
– Step 3: After consistent suppression (12–18 months), rhizomes may deplete. Replant area densely with competitive species.
– Critical Consideration to Avoid: Tilling. May spread rhizome fragments.
Quackgrass (Elymus repens) – The Lawn Invader
– Biology: Spreads by rhizomes. Tolerates mowing, drought, poor soil.
– Strategy: Solarization + competitive replanting.
– Step 1: Mow area low. Water deeply.
– Step 2: Cover with clear plastic for 6–8 weeks in peak summer heat.
– Step 3: Remove plastic. Immediately overseed with dense turf mix.
– Alternative: For garden beds, smother with cardboard + mulch for one full growing season before replanting.
– Why Quick Fixes Fail: Surface treatments rarely reach deep rhizomes. Regrowth is common.
Dandelions (Taraxacum officinale) – The Misunderstood Indicator
– Biology: Deep taproot; seeds travel on wind.
– Strategy: Targeted removal + soil improvement.
– Removal: After rain, insert dandelion digger vertically beside root. Lever gently while pulling upward. Shake soil from root; compost before flowering.
– Prevention: Address compaction (aerate lawn), raise mowing height, overseed thin areas.
– Perspective Shift: Leave a few dandelions in out-of-the-way spots. Their deep roots bring up minerals; flowers feed early bees; leaves are edible. Manage density, don’t seek total elimination.
Japanese Knotweed (Reynoutria japonica) – The Structural Concern
– Biology: Rhizomes are vigorous; grows rapidly. Classified as noxious weed in many regions.
– Critical Protocol:
– Do not attempt DIY removal. Disturbance may spread fragments.
– Contact local agricultural extension or invasive species council immediately.
– Professional treatment is typically required.
– Report sightings to authorities—early detection protects watersheds.
Universal Principle for Persistent Plants: Consistency beats intensity. Removing top growth regularly depletes root energy reserves faster than occasional deep digging. Track progress in your garden journal—celebrate small victories. A bindweed patch reduced from many shoots to few in one season is meaningful progress.
Overcoming Common Frictions and Adapting to Constraints
Even the most elegant system meets real-world constraints: time limitations, physical considerations, budget restrictions, or skepticism about effectiveness. This section addresses these friction points with pragmatic, field-tested adaptations. Organic weed management isn’t about perfection—it’s about progress tailored to your reality.
“I Don’t Have Time for Daily Weeding!” – The Time-Optimized System
Time scarcity is a common barrier. The solution isn’t working harder—it’s working smarter by front-loading prevention and leveraging “passive” suppression techniques.
The 15-Minute Weekly Maintenance Protocol:
– Tool Station: Keep a caddy by your back door with hori-hori knife, small bucket, and gloves. Eliminates setup time.
– Focus Zones: Identify your “high-value” areas (vegetable beds, front border). Prioritize these.
– The Weekly Scan: Every Saturday morning:
– Walk garden with bucket (5 minutes).
– Remove only plants flowering or with visible seeds (prevents future spread).
– Spot-mulch any bare patches with handfuls of straw (5 minutes).
– Refresh mulch edges where washed out (5 minutes).
– Seasonal Power Hours:
– Spring (2 hours): Apply fresh mulch to all beds; install drip irrigation.
– Fall (2 hours): Sow cover crops; replenish pathway mulch.
– Result: Significant reduction in summer maintenance labor.
Passive Suppression Investments:
– Cardboard + Wood Chips: Spend 2 hours smothering a perennial bed in spring. Enjoy months of reduced weeding.
– Living Mulches: Plant white clover between tomatoes once. It suppresses plants all season with minimal care.
– Drip Irrigation: Initial setup takes 1–2 hours. Eliminates watering between crops all season.
Documented Insight: A University of Vermont study tracked gardeners using layered organic methods. After Year 1 (setup phase), average maintenance time was approximately 45 minutes/week. By Year 3, it dropped to around 12 minutes/week as soil health improved and living systems matured. The upfront investment yields compounding returns.
“My Back Can’t Handle Bending Over” – Adaptive Techniques for All Bodies
Gardening should be accessible. Physical considerations call for smarter tool selection and garden redesign.
Ergonomic Tool Guide:
| Challenge | Solution | Product Examples |
|————————-|——————————————-|————————————–|
| Bending/Kneeling | Extended-handle tools (48″+) | Radius Garden tools, Fiskars Ergo |
| Grip Strength | Tools with rotating handles, foam grips | CobraHead weeder, DeWit hand tools |
| Standing Work | Raised beds (24–36″ height) | Build with cedar, stone, or kits |
| Seated Weeding | Garden kneeler/stool with tool pouch | Gardeners Supply Co. Comfort Stool |
| Reaching Far Areas | Long-reach grabber tool | Unger Ninja Grabber |
Garden Redesign Strategies:
– Raised Beds: Build frames 24–36 inches high. Fill with soil mix. Eliminates bending. Ideal width: 4 feet (reachable from both sides).
– Vertical Gardening: Grow vining crops (cucumbers, beans) on trellises. Reduces ground coverage needing attention.
– Wide Paths: Make pathways 3+ feet wide for wheelchair/scooter access. Surface with stable material (decomposed granite, pavers).
– Container Gardening: Use large pots (15+ gallon) for vegetables. Place on wheeled caddies. Maintenance is minimal and can be done seated.
Pro Tip: Install a small bench within your garden. Rest while tending nearby areas. Makes sessions sustainable.
“I Have a Large Property” – Scalable Strategies for Acres, Not Just Beds
Managing larger areas requires shifting from hand tools to landscape-scale ecological management. Principles remain identical—scaled with appropriate tools and biological allies.
Phased Implementation Plan:
1. Year 1: Protect High-Value Zones
– Focus efforts on house foundation plantings, vegetable garden, main lawn area.
– Install permanent pathways with geotextile fabric + gravel to reduce maintenance zones.
– Plant fast-growing native shrubs along property edges to create living fences.
2. Year 2: Introduce Biological Allies
– For large fields: Rent goats for targeted grazing (they consume blackberry, thistle). Contact local services.
– Plant competitive native grasses in unused areas. Once established, they outcompete invasives.
3. Year 3: Systemic Integration
– Establish permanent cover crop rotations in unused fields.
– Create habitat piles (logs, rocks) to encourage ground beetles that consume seeds.
Tool Scaling Guide:
| Task | Small Garden Tool | Large Property Tool |
|————————|————————|———————————–|
| Mowing Paths | Push mower | Riding mower with bagger |
| Mulching Beds | Wheelbarrow | Pickup truck + chipper service |
| Plant Removal | Hand weeder | String trimmer (for paths only) |
| Soil Amendment | Shovel | Broadcast spreader + tractor |
Critical Mindset Shift: Accept that not all areas need manicured perfection. Designate “wild zones” where native plants support biodiversity. Mow these zones just twice yearly to prevent woody invasion. This reduces labor while enhancing ecosystem health.
“Are Organic Methods Really Effective Against Tough Plants?” – Addressing Skepticism with Transparency
Doubt is natural after years of chemical promises. Let’s address concerns directly with transparency about capabilities and limitations.
The Reality Check:
– Organic methods require consistency, not magic. Removing bindweed once won’t eliminate it. Removing it every time it sprouts for many months may deplete it. This isn’t weakness—it’s working with biological reality. Chemicals offer temporary suppression with potential long-term consequences (soil degradation, water concerns, resistant plants).
– Effectiveness is measured differently. Chemicals judge success by “plant kill” in days. Organic systems judge success by reduced labor over time and improved soil health. After several years of layered organic management, many gardeners report spending less time on maintenance than they did with chemical routines.
– Peer-Reviewed Validation:
– Rodale Institute’s long-term Farming Systems Trial shows organic systems suppress weeds effectively after transition, with higher soil organic matter.
– University of California research confirms corn gluten meal reduces crabgrass emergence when applied correctly.
– Meta-analysis in Agriculture, Ecosystems & Environment (2020) found cover crops reduced weed biomass significantly across global studies.
When to Seek Professional Guidance:
– For severe infestations of state-listed noxious plants (Japanese knotweed, giant hogweed).
– When plants threaten structural integrity.
– If physical limitations prevent safe implementation.
Consult certified organic landscapers or your cooperative extension service. Many offer site visits and customized plans.
The Bigger Picture: Organic weed management isn’t just about fewer weeds—it’s about cultivating a garden that thrives. Healthier soil grows more resilient plants. Diverse habitats support pollinators and beneficial insects. Reduced chemical exposure protects children, pets, and local waterways. The “effectiveness” extends far beyond plant counts to the entire ecosystem you steward.
Your Questions, Answered
Gardeners consistently ask these questions across forums, extension hotlines, and workshops. Answers integrate current research, practical experience, and ecological context—without oversimplification or alarmism.
Q: Will vinegar kill weeds permanently?
A: Household vinegar (5% acetic acid) desiccates top growth but rarely kills roots of perennial plants like dandelions or bindweed. Regrowth typically occurs within days or weeks. Vinegar is most effective on young annual plants in hardscapes (driveways, patios). Critical caution: Adding salt to vinegar solutions may cause long-term soil changes—salt accumulates, potentially harming future plant growth and soil structure. Reserve vinegar for non-planting areas, and never use it as a routine garden solution. Physical removal remains more effective and soil-friendly for garden beds.
Q: Is it safe to compost weeds?
A: It depends entirely on the plant’s life stage and your compost system. Generally safe to compost: Annual plants pulled before flowering (chickweed, lambsquarters). Chop finely to speed decomposition. Compost only in hot systems: Perennial plants or plants with seeds. Your pile must reach and maintain high temperatures (verified with a compost thermometer) to kill viability. Dispose responsibly: Invasive species (Japanese knotweed, bindweed fragments), diseased plants, or plants with mature seeds. When in doubt, solarize questionable plants in a black plastic bag for several weeks (place in hot sun until contents decompose), then follow local disposal guidelines.
Q: How often should I mulch my garden?
A: Replenish organic mulches (straw, wood chips, leaves) when depth falls below 2 inches—typically once per growing season in spring. In hot climates or on slopes, mid-summer top-ups may be needed. Avoid piling mulch against tree trunks; keep mulch 3+ inches away from stems to prevent moisture-related issues. For living mulches (clover, thyme), mow or trim 2–3 times per season to maintain density without overwhelming desired plants. Consistent mulch depth is more important than frequent reapplication—measure initially to train your eye.
Q: Can I use newspaper instead of cardboard for smothering?
A: Yes, with considerations. Use 8–10 sheets of black-and-white newspaper (no colored ink) overlapped by 6 inches. Wet thoroughly before applying 3 inches of organic mulch on top to prevent blowing away. Newspaper decomposes faster than cardboard (3–6 months vs. 6–18 months), making it ideal for seasonal suppression before planting. Avoid glossy inserts or magazines. Cardboard provides longer-lasting suppression for perennial beds or pathways; newspaper suits annual vegetable beds where you’ll replant yearly.
Q: Are homemade weed killers safe for pets and children?
A: “Natural” doesn’t automatically mean safe. Vinegar solutions can irritate eyes and skin; concentrated acetic acid causes burns. Boiling water poses scalding risks. Salt solutions may alter soil long-term. Safest protocol: Keep pets and children away during application. Wait until surfaces are completely dry before allowing access (typically 1–2 hours). For garden beds, physical removal (hand-weeding) is safest around play areas. If using any spray, apply on calm days to avoid drift, and store solutions securely labeled. When safety is a concern, prioritize prevention (mulch, dense planting) over elimination methods.
Q: Why do weeds keep coming back in the same spot?
A: Persistent plants often signal an unresolved condition. Dandelions in lawns may indicate compacted soil; chickweed in beds suggests excessive moisture; bindweed thrives in disturbed, nutrient-rich soil. Instead of just removing the plant, diagnose the cause: aerate compacted areas, improve drainage, adjust inputs, or minimize soil disturbance. Also check for hidden seed sources—a mature plant nearby may be dispersing seeds into the spot. Address both the symptom (remove plant) and the cause (amend conditions) for lasting change.
Q: Does corn gluten meal really prevent weeds?
A: Yes, with precise timing and limitations. Corn gluten meal inhibits root formation in germinating seeds—it does nothing to established plants. Apply weeks before your region’s typical seed germination (e.g., early spring for crabgrass). Effectiveness requires moisture within days of application to activate natural oils. Works best in lawns and established beds with minimal soil disturbance. Not suitable for areas you’ve recently seeded—will prevent your grass or flower seeds from sprouting too. University studies have shown reductions in seedling emergence when applied correctly; combine with other layers for best results.
Q: How do I stop weeds from growing between patio stones?
A: Prevention during installation is ideal (polymeric sand in joints), but for existing patios: 1) Scrape plants from cracks with a stiff brush or old knife. 2) Sweep joints thoroughly. 3) Fill cracks with coarse sand or polymeric sand (follow product instructions). 4) For ongoing maintenance: pour boiling water directly into cracks weekly until plants cease; or use a propane torch briefly (1–2 seconds per spot) on dry, windless days. Avoid vinegar on natural stone (may etch surfaces) and salt (may affect nearby soil). Sweep joints monthly to remove organic debris that harbors seeds.
Q: Can I use landscape fabric in my vegetable garden?
A: Generally discouraged in planting areas. Fabric can create issues: soil builds up on top, becoming a germination layer; roots of desired plants may grow into fabric; it degrades over time; it may hinder earthworm activity and organic matter integration. Instead, use biodegradable barriers: cardboard or newspaper topped with straw or wood chips. These suppress plants while decomposing to enrich soil. For pathways between beds, landscape fabric under gravel is acceptable if contained and monitored.
Q: What’s the single most effective organic weed control method?
A: There is no single “most effective” method—this is the core insight of the Four-Layer Framework. However, consistent mulching delivers high value for most gardeners. A 2–3 inch layer of organic mulch applied annually prevents many weed seeds from germinating while improving soil health, conserving water, and moderating temperatures. Combine this with timely removal of flowering plants (preventing seed production), and you address both prevention and elimination layers with minimal labor. Start here if overwhelmed—mulch is the foundational habit that makes all other strategies easier.
Q: How long does it take to see results with organic methods?
A: Expect noticeable reduction in maintenance labor within one growing season when implementing multiple layers consistently. Significant transformation (substantial reduction in labor) typically occurs by Year 2 as soil biology improves and living systems mature. Full ecosystem resilience—where opportunistic plants are occasional indicators rather than constant pressures—develops over several years. Track progress: note minutes spent weekly in a journal. Small victories compound. Remember: you’re not just managing plants; you’re cultivating a healthier, more self-sustaining garden that rewards patience with lasting beauty and productivity.
Conclusion and Your Path Forward
We began by reframing opportunistic plants not as enemies to conquer, but as messengers revealing opportunities for deeper garden health. Through the Four-Layer Defense Framework—Prevention, Suppression, Elimination, and Restoration—you now hold a cohesive system that has been effective across diverse climates and garden types. This isn’t a collection of isolated tips; it’s an integrated approach where each action reinforces the next. Healthy soil nurtures dense plantings that shade the soil. Strategic mulching conserves moisture while feeding microbes. Thoughtful removal preserves soil structure. Intentional restoration closes the loop, building resilience season after season. The evidence is clear: gardens managed this way often require less labor over time, produce more vibrant plants, support greater biodiversity, and protect the water and soil we all depend on.
Recap: The Three Pillars of Lasting Success
- Shift from Reaction to Prevention: Invest thoughtfully in soil health, mulching, and smart design. This single mindset change addresses the majority of future maintenance needs.
- Embrace Layered Consistency Over Quick Fixes: No single tactic wins alone. But consistent application of multiple layers—removing flowering plants weekly, refreshing mulch seasonally, planting cover crops annually—creates compounding benefits.
- Read Your Garden’s Language: When plants appear, ask “Why here? Why now?” Is soil compacted? Overwatered? Bare? Let their presence guide your next improvement rather than triggering frustration.
The 24-Hour Rule: One Small Step to Momentum
Within the next 24 hours, take one tiny, specific action:
– If overwhelmed: Spend 10 minutes walking your garden with a notepad. Circle one high-priority area (a weedy vegetable bed, a crack-filled patio). Write down: “I will apply 3 inches of straw mulch to this bed Saturday morning.”
– If ready to act: Fill a bucket with water. Grab your hori-hori knife. Remove only plants with visible flowers or seeds from your highest-value zone. Shake soil from roots back into the garden. Compost the rest. That’s it—15 minutes of targeted action prevents countless future seeds.
This micro-commitment builds confidence. Momentum follows action, not the reverse.
The Big Picture: Cultivating More Than a Garden
Organic weed management is a practice in ecological literacy. Each time you choose soil health over chemical suppression, you participate in a larger movement restoring balance to our landscapes. You protect pollinators sipping nectar from clover flowers. You safeguard groundwater. You model stewardship for children who learn that solutions can be gentle yet powerful. Your garden becomes a living classroom where patience, observation, and collaboration with nature yield rewards far beyond plant-free soil—a sanctuary of resilience, beauty, and quiet wisdom. The work continues, season after season, but with each layer you strengthen, the labor lightens and the joy deepens. You are not just growing plants; you are cultivating a legacy of care.
Explore Our Complete System:
Building Living Soil: A Season-by-Season Guide to Fertile Ground | Companion Planting Decoded: Natural Pest Support and Pollinator Power | Water-Wise Gardening: Conservation Strategies That Save Time and Resources | The No-Till Garden: Preserving Soil Life While Maximizing Yields | Seasonal Garden Journal: Templates for Observation, Planning, and Growth